We sacrifice by not doing any other technology, so that you get the best of Magento.

We sacrifice by not doing any other technology, so that you get the best of Magento.

    Multi Store Switcher not working while customer is logged in to front side – Magento 2.3.3

    Please Follow Below steps to resolved such error of store switcher :

    – Follow the below steps to resolve the switcher issue.

    Step 1: You need to override the following file of the vendor module as mentioned below.

    Override this File in your module :

    vendor/magento/module-store/etc/di.xml

    Step 2: Replace the following code :

     <type name="MagentoStoreModelStoreSwitcher"> 
         <arguments> 
             <argument name="storeSwitchers" xsi:type="array"> 
                 <item name="cleanTargetUrl" xsi:type="object">MagentoStoreModelStoreSwitcherCleanTargetUrl</item> 
                 <item name="manageStoreCookie" xsi:type="object">MagentoStoreModelStoreSwitcherManageStoreCookie</item> 
                 <item name="managePrivateContent" xsi:type="object">MagentoStoreModelStoreSwitcherManagePrivateContent</item> 
                 <item name="hashGenerator" xsi:type="object">MagentoStoreModelStoreSwitcherHashGenerator</item> 
             </argument> 
         </arguments> 
     </type>

    with

     <type name="MagentoStoreModelStoreSwitcher"> 
         <arguments> 
             <argument name="storeSwitchers" xsi:type="array"> 
                 <item name="cleanTargetUrl" xsi:type="object">MagentoStoreModelStoreSwitcherCleanTargetUrl</item> 
                 <item name="manageStoreCookie" xsi:type="object">MagentoStoreModelStoreSwitcherManageStoreCookie</item> 
                 <item name="managePrivateContent" xsi:type="object">MagentoStoreModelStoreSwitcherManagePrivateContent</item> 
             </argument> 
         </arguments> 
     </type>

    Clean the cache and You are done.


    How to add custom pagination in custom collection?

    By default, Magento 2 provides the pagination facility for the product pages, category pages, etc. It helps in easy navigation. Without pagination, the page load time increases.

    The default Magento 2 does not provide pagination for a custom collection.

    To add pagination in Magento 2 with a custom collection

    create a block file in your module :

    <?php
    namespace MagemonkeyGeneralBlock;
    
    class Monthlyspecial extends MagentoFrameworkViewElementTemplate {
    
    private $_objectManager;
    
    public function __construct(MagentoCatalogBlockProductContext $context,
    MagentoFrameworkAppConfigScopeConfigInterface $scopeConfig,
    MagentoFrameworkObjectManagerInterface $objectmanager,
    array $data = []) {
    
    parent::__construct($context, $data);
    $this->_isScopePrivate = true;
    $this->_objectManager = $objectmanager;
    $this->scopeConfig = $scopeConfig;
    
    }
    protected function _prepareLayout()
    {
    parent::_prepareLayout();
    if ($this->getMonthlySpecial()) {
    $pager = $this->getLayout()->createBlock(
    'MagentoThemeBlockHtmlPager',
    'monthlyspecial.history.pager'
    )->setAvailableLimit(array(12=>12,24=>24,36=>36,48=>48,52=>52))
    ->setShowPerPage(true)->setCollection(
    $this->getMonthlySpecial()
    );
    $this->setChild('pager', $pager);
    $this->getMonthlySpecial()->load();
    }
    return $this;
    //return parent::_prepareLayout();
    }
    
    public function getPagerHtml()
    {
    return $this->getChildHtml('pager');
    }
    
    Public function getMonthlySpecial()
    {
    $page=($this->getRequest()->getParam('p'))? $this->getRequest()->getParam('p') : 1;
    $pageSize=($this->getRequest()->getParam('limit'))? $this->getRequest
    ()->getParam('limit') : 12;
    
    $cateinstance = $this->_objectManager->create('MagentoCatalogModelCategoryFactory');
    
    $allproduct = $cateinstance->create()->load(0)->getProductCollection()->addAttributeToSelect('*')
    ->addAttributeToFilter('manager_special', 0)
    ->addAttributeToFilter('email_special', 0)
    ->addAttributeToFilter('status', 1)
    ->addAttributeToFilter('visibility', 4)
    ->setOrder('price', 'ASC');
    
    $collection = $allproduct;
    $collection->setPageSize($pageSize);
    $collection->setCurPage($page);
    return $collection;
    }
    }

    create a view phtml file where you use pagination in your module

    Just call getPagerHTML() code as per shown below.

    <?php echo $this->getPagerHtml() ?>
    <?php
    
    $allproduct = $this->getMonthlySpecial();
    
    <div id="layer-product-list">
        <div class="toolbar toolbar-products">
            <div class="pages">
            <?php echo $this->getPagerHtml() ?>
            </div>
        </div>      
        <div class="category-products products wrapper grid products-grid">
        <?php foreach ($allproduct as $key => $productdata) {
        	//add code for your data in loop
        }
        ?>
        </div>
    </div>


    How to show minicart in custom popup in magento2?

    By using below codes, you can display a mini cart in the custom popup, and you can also set your popup design as per your requirement.

    Step 1:  create default.xml file inside,

    appcodeMagemonkeysPopupCartviewfrontendlayout folder and add the below code:

    <?xml version="1.0"?>
    <page xmlns:xsi="http://www.w3.org/2001/XMLSchema-instance" xsi:noNamespaceSchemaLocation="urn:magento:framework:View/Layout/etc/page_configuration.xsd">
        <update handle="checkout_cart_sidebar_item_renderers"/>
        <update handle="checkout_cart_sidebar_item_price_renderers"/>
        <update handle="checkout_cart_sidebar_total_renderers"/>
        <body>
            <referenceContainer name="content">
                <block name="custom_minicart" as="custom_minicart" template="Vendor_Extension::custompopupcart.phtml">
                    <arguments>
                        <argument name="jsLayout" xsi:type="array">
                            <item name="types" xsi:type="array"/>
                            <item name="components" xsi:type="array">
                                <item name="minicart_content" xsi:type="array">
                                    <item name="component" xsi:type="string">Magento_Checkout/js/view/minicart</item>
                                    <item name="config" xsi:type="array">
                                        <item name="template" xsi:type="string">Magento_Checkout/minicart/content</item>
                                    </item>
                                    <item name="children" xsi:type="array">
                                        <item name="subtotal.container" xsi:type="array">
                                            <item name="component" xsi:type="string">uiComponent</item>
                                            <item name="config" xsi:type="array">
                                                <item name="displayArea" xsi:type="string">subtotalContainer</item>
                                            </item>
                                            <item name="children" xsi:type="array">
                                                <item name="subtotal" xsi:type="array">
                                                    <item name="component" xsi:type="string">uiComponent</item>
                                                    <item name="config" xsi:type="array">
                                                        <item name="template" xsi:type="string">Magento_Checkout/minicart/subtotal</item>
                                                    </item>
                                                </item>
                                            </item>
                                        </item>
                                        <item name="extra_info" xsi:type="array">
                                            <item name="component" xsi:type="string">uiComponent</item>
                                            <item name="config" xsi:type="array">
                                                <item name="displayArea" xsi:type="string">extraInfo</item>
                                            </item>
                                        </item>
                                        <item name="promotion" xsi:type="array">
                                            <item name="component" xsi:type="string">uiComponent</item>
                                            <item name="config" xsi:type="array">
                                                <item name="displayArea" xsi:type="string">promotion</item>
                                            </item>
                                        </item>
                                    </item>
                                </item>
                            </item>
                        </argument>
                    </arguments>
                </block>
            </referenceContainer>
        </body>
    </page>

    Step 2: Next step should be about creating custompopupcart.phtml file inside appcodeMagemonkeysPopupCartviewfrontendtemplates folder and add the below code:

    <div style="display: none" id="popup-mpdal">
        <div id="minicart-content-wrapper" data-bind="scope: 'minicart_content'">
            <!-- ko template: getTemplate() --><!-- /ko -->
        </div>
    </div>
    <script>
        window.checkout = <?=  $block->getSerializedConfig() ?>;
    </script>
    <script type="text/x-magento-init">
        {
            "[data-block='minicart']": {
                "Magento_Ui/js/core/app": <?=  $block->getJsLayout() ?>
            },
            "*": {
                "Magento_Ui/js/block-loader": "<?= $block->getViewFileUrl('images/loader-1.gif') ?>"
            }
        }
        </script>
    <script>
        require(
            [
                'jquery',
                'Magento_Ui/js/modal/modal'
            ],
            function(
                $,
                modal
            ) {
                var options = {
                    type: 'popup',
                    responsive: true,
                    innerScroll: true,
                    buttons: [{
                        text: $.mage.__('Continue'),
                        click: function () {
                            this.closeModal();
                            $('#popup-mpdal').hide();
                        }
                    }]
                };
                $('#popup-mpdal').show();
                var popup = modal(options, $('#popup-mpdal'));
                $("#popup-mpdal").modal("openModal");
            }
        );
    </script>

    Step 3:  The final step is to refresh the Cache.

    How to add Edit and Remove product button in Order summary on Checkout page?

    The default Magento 2 does not provide Edit and Remove product button in Order summary on the checkout page. But, it provides on Cart page and Mini-cart.

    Follow the below instructions to set Edit and Remove product button Order summary on the checkout page.

    Override details.html file in your theme

    /app/design/frontend/[VendorName]/[theme]/Magento_Checkout/web/template/summary/item/details.html

    And add below code in this file

    <div class="primary">
        <a data-bind="attr: {href: getConfigUrl($parent.item_id),title: $t('Edit item')}" class="action edit">
            <span data-bind="i18n: 'Edit'"></span>
        </a>
    </div>
    <div class="secondary">
        <a href="#" data-bind="attr: {'data-post': getDataPost($parent.item_id),title: $t('Delete item')}" class="action delete">
            <span data-bind="i18n: 'Remove'"></span>
        </a>
    </div>

    Override details.js file in your theme

    /app/design/frontend/[VendorName]/[theme]/Magento_Checkout/web/js/view/summary/item/details.js

    define(
        [
            'uiComponent',
            'mage/url',
            'Magento_Customer/js/customer-data',
            'jquery',
            'ko',
            'underscore',
            'sidebar',
            'mage/translate'
        ],
        function (Component,url,customerData,$,ko, _) {
            "use strict";
            return Component.extend({
                defaults: {
                    template: 'Magento_Checkout/summary/item/details'
                },
                getValue: function(quoteItem) {
                    var itemId = elem.data('cart-item'),
                    itemQty = elem.data('item-qty');
                    return quoteItem.name;
                },
                getDataPost: function(itemId) { 
                    console.log(itemId);
                    var itemsData = window.checkoutConfig.quoteItemData;
                    var obj = {};
                    var obj = {
                        data: {}
                    };
    
                    itemsData.forEach(function (item) {
                        if(item.item_id == itemId) { 
                            var mainlinkUrl = url.build('checkout/cart/delete/');
                            //var baseUrl = url.build('checkout/cart/');
                            var baseUrl = url.build('checkout/');
                            console.log(mainlinkUrl);
                            obj.action = mainlinkUrl;
                            obj.data.id= item.item_id;
                            obj.data.uenc = btoa(baseUrl);
                        }
                    });
                    return JSON.stringify(obj);
                },
                getConfigUrl: function(itemId) { 
                    var itemsData = window.checkoutConfig.quoteItemData;
                    var configUrl = null;
                    var mainlinkUrl = url.build('checkout/cart/configure');
                    var linkUrl;
                    itemsData.forEach(function (item) {
                        var itm_id = item.item_id;
                        var product_id = item.product.entity_id;
                        if(item.item_id == itemId) { 
                            linkUrl = mainlinkUrl+"/id/"+itm_id+"/product_id/"+product_id;
                        }
                    });
                    if(linkUrl != null) {
                        return linkUrl;
                    }
                    else {
                        return '';
                    }
    
                }
            });
        }
    );

    Then run below commands.

    php bin/magento setup:upgrade
    php bin/magento setup:static-content:deploy
    php bin/magento cache:flush

    That’s all folks. Hope it worked for you.

    Ecommerce + Coronavirus: Adapting Your Magento Store

    If coronavirus has negatively impacted your sales or your ability to conduct business as usual, all is not lost. While the impact of coronavirus on consumer preferences and demands may last beyond the virus, life will return to normal — even if it’s a “new normal.”

    In the meantime, here are nine tips for adapting your ecommerce strategy in this changing world.

    1. Contact your manufacturers.

    As we’ve discussed, there are a lot of factors at play here. You may see a surge in demand on your online store; you may not — but, either way, supply could become an issue.

    Talk to your manufacturers about where they stand on production and how they anticipate coronavirus impacting their business. You can’t plan for what you don’t know, so do your best to be as informed as possible about all aspects of your supply chain.

    2. Search for alternative providers.

    When coronavirus first appeared, it was largely centred in China — which is also where many sellers source their products. This did cause inventory shortages for some sellers who were unable to find alternate suppliers.

    There is evidence that China is slowly but surely returning to business as usual, but other countries are feeling the strain (including the U.S.). Having a few different options to lean on as the situation evolves globally can help you mitigate risk.

    3. Conduct a customer needs evaluation.

    Think about your target or ideal customer groups — what’s their current situation? Are they working from home, serving on the front lines as essential workers, or furloughed/laid off? What are their particular needs and concerns right now?

    Once you better understand their current needs, you can assess your readiness to meet them. Consider whether you currently have the inventory to support their needs or if you should consider pivoting to better serve them.

    4. Shift towards an at-home audience.

    One of the most obvious impacts of coronavirus is the increase in spending much more time at home than usual. Think about how you can shift your strategy to better serve their needs, or even delight them in these stressful times.

    Restaurants are a great example of this. Since they’ve had to close their dine-in services, they have ramped up the curbside pick-up and delivery services to make ends meet and keep customers fed.

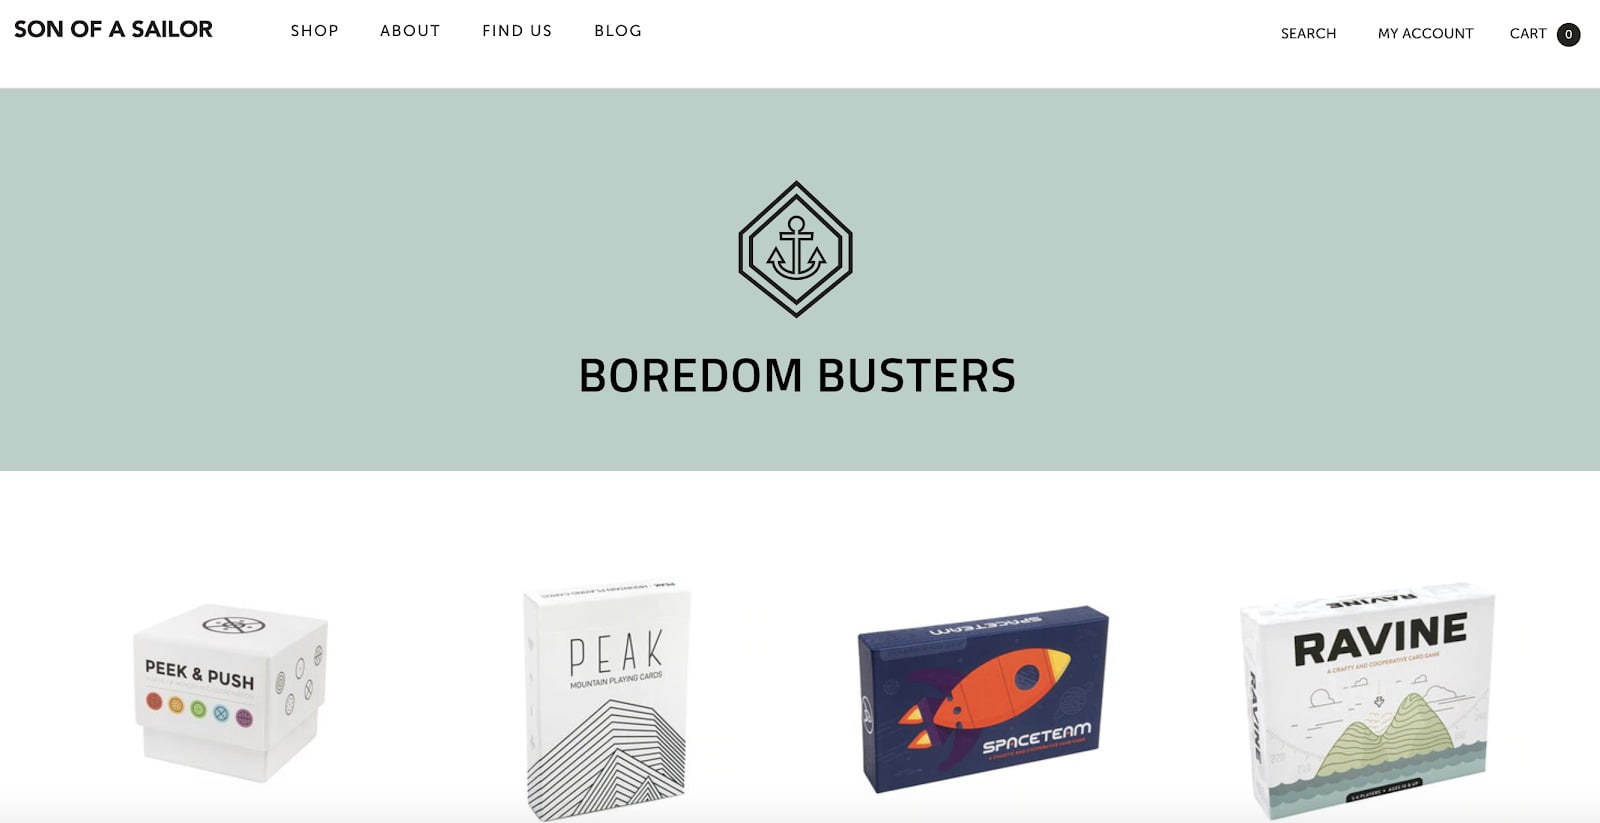
    On the ecommerce side, some stores have begun stocking new items and/or featuring collections of existing products that are more relevant to many people’s day-to-day lives now — specifically, staying at home.  Son of a Sailor, a shop focused on gifts like jewellery and other accessories, has a product collection page of “Boredom Busters” featured on their homepage.

    5. Embrace new sales channels.

    One of the consequences of people being asked to stay at home is, of course, a large decrease in brick-and-mortar foot traffic — or even shop closures. This is a great time for brick-and-mortars to start an online store if they don’t already have one or, if they do, to double down on their online presence and digital marketing.

    6. Update product pages.

    In times of uncertainty, you want to make sure to communicate with your customers if any of your services will be changing.

    Coronavirus has presented a situation that may cause supply chain issues, even on a per-product basis — and if that’s the case for your business, keep your product pages updated so your customers know what to expect. You may learn that certain products will be out of stock for a while, that shipments are taking longer to reach their destinations, or some of your products are selling out more quickly than usual.

    This is all-important information for your customers to have as they shop your store. Be transparent and provide as much information as you can. By managing expectations, you’ll be more likely to have satisfied customers — even if you are experiencing a slow-down in service.

    7. Have a data mindset and people focus.

    One of the biggest keys to a successful business is being able to recognize and fill the needs of a certain subset of customers. Even in the face of today’s global situation, that fact remains the same.

    Luckily, our connected society offers so many opportunities to collect data. Use it to your advantage and observe the difference in customer behaviour. If you focus on meeting their needs as they are today, you’ll be better equipped to weather the storm of uncertainty.

    8. Be smart about PPC advertising.

    It stands to reason that with more people at home, there are more Google searches going on — and some are turning to ecommerce for products they would have previously purchased in person

    It makes sense to consider PPC if you’re not already doing it, especially if your store has items that are relevant to the change in our lives due to coronavirus (including things to entertain kids stuck at home) — but it won’t be right for every business.

    Make sure to watch your data closely, and adjust your bidding strategy if necessary. If you see that certain times of day have much lower conversion rates, reduce your bids for those times to save money.

    9. Find opportunities for a special offer.

    Economic uncertainty, layoffs, and lost jobs may increase price sensitivity in some shoppers. Consider offering a special discount across your store or on specific items that may have higher demand. If consumer spending in your store is down, discounts could be a good way to draw shoppers back.

    10. Create an undeniable loyalty program.

    It’s been said numerous times in countless retail blogs that most retailers can bank on 80% of their future profits being generated from just 20% of their existing customers. The current times are no different, in fact, it’s now more important than ever to ensure that you’re recapturing your existing customers and encouraging their loyalty! This is where a powerful, data-driven loyalty program comes in. Customers are currently more active than ever online and rewarding them for shopping with you right from purchase #1 is the perfect way to keep them coming back.

    By using a loyalty program that encourages your customers to repeatedly shop with you, you’re not only ensuring the longevity of your business, you’re also ensuring that your customers feel appreciated and valued. Promote customer satisfaction by creating a loyalty program that rewards customers for completing certain actions, like giving points when they first sign-up so customers are closer to redeeming their first reward, or even creating exclusive rewards that are only available in May to help re-engage your existing customers with your loyalty program.

    Singapore-based lingerie retailer, Our Bralette Club, has mastered this with a generously comprehensive rewards program, the ‘OBC Peach Party’, that is sure to delight all of their customers. With VIP tiers and a wide variety of generous rewards, customers are able to claim and redeem rewards such as $5 off a purchase or a free tote bag with their order. Our Bralette Club is even offering a 20% off coupon code to encourage their customers to continue shopping online during the lockdown and beyond.

    Don’t be afraid to get creative and even go COVID-19 specific with your rewards program, just make sure you’re keeping tabs on it! If you find that customers aren’t really redeeming your rewards, it could be a good opportunity to the communication of your loyalty program, edit your rewards, change up your emails, or even look at what other businesses are offering at this time.

    Preparing Your Online Store for After Coronavirus

    In addition to adjusting your current strategy, you’ll want to take steps to ensure quick recovery when we return to business as usual.

    1. Prepare for building demand.

    An article published on Entrepreneur.com suggests that, based on what’s happening in China, “the post-coronavirus economic recovery might be faster than we expect.”

    Some verticals, particularly those that saw decreased sales during the pandemic, may see a huge resurgence in demand once consumers begin to return to everyday life. Make sure you’re prepared so you’re in a strong position to bounce back quickly.

    2. Address technological shortfalls.

    For brands who are seeing a slowdown, this is a great opportunity to evaluate your tech stack without worrying as much about disruptions.

    Look closely at your ecommerce platform, integrations, and marketing to make sure you’re ready for the return of shopping as usual. Improving your site’s SEO, ensuring page speed, and optimizing your checkout experience are just a few of many beneficial ways you can spend your time to set yourself up for future success.

    Source: Big commerce

    How to fix email attachment issue in magento2.3.3?

    Follow the below steps, and the email attachment will start working as it worked previously.

    First, you have to create a “di.xml” file inside your extension folder.

    app/code/Magemonkeys/EmailAttachment/etc

    <preference for="MagentoFrameworkMailTemplateTransportBuilder" type="MagemonkeysEmailAttachmentModelMailTemplateTransportBuilder" />

    Now, you have to create one more file “transportBuilder.php” inside your Template folder with the below code.

    app/code/Magemonkeys/EmailAttachment/Model/Mail/Template/

    <?php
    declare(strict_types=1);
    namespace MagemonkeysEmailAttachmentModelMailTemplate;
    use MagentoFrameworkAppTemplateTypesInterface;
    use MagentoFrameworkExceptionLocalizedException;
    use MagentoFrameworkExceptionMailException;
    use MagentoFrameworkMailEmailMessageInterface;
    use MagentoFrameworkMailEmailMessageInterfaceFactory;
    use MagentoFrameworkMailAddressConverter;
    use MagentoFrameworkMailExceptionInvalidArgumentException;
    use MagentoFrameworkMailMessageInterface;
    use MagentoFrameworkMailMessageInterfaceFactory;
    use MagentoFrameworkMailMimeInterface;
    use MagentoFrameworkMailMimeMessageInterfaceFactory;
    use MagentoFrameworkMailMimePartInterfaceFactory;
    use MagentoFrameworkMailTemplateFactoryInterface;
    use MagentoFrameworkMailTemplateSenderResolverInterface;
    use MagentoFrameworkMailTemplateInterface;
    use MagentoFrameworkMailTransportInterface;
    use MagentoFrameworkMailTransportInterfaceFactory;
    use MagentoFrameworkObjectManagerInterface;
    use MagentoFrameworkPhrase;
    use ZendMimeMime;
    use ZendMimePartFactory;
     
    /**
     * TransportBuilder
     *
     * @api
     * @SuppressWarnings(PHPMD.CouplingBetweenObjects)
     * @since 100.0.2
     */
    class TransportBuilder extends MagentoFrameworkMailTemplateTransportBuilder
    {
        /**
         * Template Identifier
         *
         * @var string
         */
        protected $templateIdentifier;
     
        /**
         * Template Model
         *
         * @var string
         */
        protected $templateModel;
     
        /**
         * Template Variables
         *
         * @var array
         */
        protected $templateVars;
     
        /**
         * Template Options
         *
         * @var array
         */
        protected $templateOptions;
     
        /**
         * Mail Transport
         *
         * @var TransportInterface
         */
        protected $transport;
     
        /**
         * Template Factory
         *
         * @var FactoryInterface
         */
        protected $templateFactory;
     
        /**
         * Object Manager
         *
         * @var ObjectManagerInterface
         */
        protected $objectManager;
     
        /**
         * Message
         *
         * @var EmailMessageInterface
         */
        protected $message;
     
        /**
         * Sender resolver
         *
         * @var SenderResolverInterface
         */
        protected $_senderResolver;
     
        /**
         * @var TransportInterfaceFactory
         */
        protected $mailTransportFactory;
     
        /**
         * Param that used for storing all message data until it will be used
         *
         * @var array
         */
        private $messageData = [];
     
        /**
         * @var EmailMessageInterfaceFactory
         */
        private $emailMessageInterfaceFactory;
     
        /**
         * @var MimeMessageInterfaceFactory
         */
        private $mimeMessageInterfaceFactory;
     
        /**
         * @var MimePartInterfaceFactory
         */
        private $mimePartInterfaceFactory;
     
        /**
         * @var AddressConverter|null
         */
        private $addressConverter;
     
        protected $attachments = [];
     
        protected $partFactory;
     
        /**
         * TransportBuilder constructor
         *
         * @param FactoryInterface $templateFactory
         * @param MessageInterface $message
         * @param SenderResolverInterface $senderResolver
         * @param ObjectManagerInterface $objectManager
         * @param TransportInterfaceFactory $mailTransportFactory
         * @param MessageInterfaceFactory|null $messageFactory
         * @param EmailMessageInterfaceFactory|null $emailMessageInterfaceFactory
         * @param MimeMessageInterfaceFactory|null $mimeMessageInterfaceFactory
         * @param MimePartInterfaceFactory|null $mimePartInterfaceFactory
         * @param addressConverter|null $addressConverter
         * @SuppressWarnings(PHPMD.UnusedFormalParameter)
         * @SuppressWarnings(PHPMD.ExcessiveParameterList)
         */
        public function __construct(
            FactoryInterface $templateFactory,
            MessageInterface $message,
            SenderResolverInterface $senderResolver,
            ObjectManagerInterface $objectManager,
            TransportInterfaceFactory $mailTransportFactory,
            MessageInterfaceFactory $messageFactory = null,
            EmailMessageInterfaceFactory $emailMessageInterfaceFactory = null,
            MimeMessageInterfaceFactory $mimeMessageInterfaceFactory = null,
            MimePartInterfaceFactory $mimePartInterfaceFactory = null,
            AddressConverter $addressConverter = null
        ) {
            $this->templateFactory = $templateFactory;
            $this->objectManager = $objectManager;
            $this->_senderResolver = $senderResolver;
            $this->mailTransportFactory = $mailTransportFactory;
            $this->emailMessageInterfaceFactory = $emailMessageInterfaceFactory ?: $this->objectManager
                ->get(EmailMessageInterfaceFactory::class);
            $this->mimeMessageInterfaceFactory = $mimeMessageInterfaceFactory ?: $this->objectManager
                ->get(MimeMessageInterfaceFactory::class);
            $this->mimePartInterfaceFactory = $mimePartInterfaceFactory ?: $this->objectManager
                ->get(MimePartInterfaceFactory::class);
            $this->addressConverter = $addressConverter ?: $this->objectManager
                ->get(AddressConverter::class);
            $this->partFactory = $objectManager->get(PartFactory::class);
            parent::__construct($templateFactory, $message, $senderResolver, $objectManager, $mailTransportFactory, $messageFactory, $emailMessageInterfaceFactory, $mimeMessageInterfaceFactory,
                $mimePartInterfaceFactory, $addressConverter);
        }
     
        /**
         * Add cc address
         *
         * @param array|string $address
         * @param string $name
         *
         * @return $this
         */
        public function addCc($address, $name = '')
        {
            $this->addAddressByType('cc', $address, $name);
     
            return $this;
        }
     
        /**
         * Add to address
         *
         * @param array|string $address
         * @param string $name
         *
         * @return $this
         * @throws InvalidArgumentException
         */
        public function addTo($address, $name = '')
        {
            $this->addAddressByType('to', $address, $name);
     
            return $this;
        }
     
        /**
         * Add bcc address
         *
         * @param array|string $address
         *
         * @return $this
         * @throws InvalidArgumentException
         */
        public function addBcc($address)
        {
            $this->addAddressByType('bcc', $address);
     
            return $this;
        }
     
        /**
         * Set Reply-To Header
         *
         * @param string $email
         * @param string|null $name
         *
         * @return $this
         * @throws InvalidArgumentException
         */
        public function setReplyTo($email, $name = null)
        {
            $this->addAddressByType('replyTo', $email, $name);
     
            return $this;
        }
     
        /**
         * Set mail from address
         *
         * @param string|array $from
         *
         * @return $this
         * @throws InvalidArgumentException
         * @see setFromByScope()
         *
         * @deprecated 102.0.1 This function sets the from address but does not provide
         * a way of setting the correct from addresses based on the scope.
         */
        public function setFrom($from)
        {
            return $this->setFromByScope($from);
        }
     
        /**
         * Set mail from address by scopeId
         *
         * @param string|array $from
         * @param string|int $scopeId
         *
         * @return $this
         * @throws InvalidArgumentException
         * @throws MailException
         * @since 102.0.1
         */
        public function setFromByScope($from, $scopeId = null)
        {
            $result = $this->_senderResolver->resolve($from, $scopeId);
            $this->addAddressByType('from', $result['email'], $result['name']);
     
            return $this;
        }
     
        /**
         * Set template identifier
         *
         * @param string $templateIdentifier
         *
         * @return $this
         */
        public function setTemplateIdentifier($templateIdentifier)
        {
            $this->templateIdentifier = $templateIdentifier;
     
            return $this;
        }
     
        /**
         * Set template model
         *
         * @param string $templateModel
         *
         * @return $this
         */
        public function setTemplateModel($templateModel)
        {
            $this->templateModel = $templateModel;
            return $this;
        }
     
        /**
         * Set template vars
         *
         * @param array $templateVars
         *
         * @return $this
         */
        public function setTemplateVars($templateVars)
        {
            $this->templateVars = $templateVars;
     
            return $this;
        }
     
        /**
         * Set template options
         *
         * @param array $templateOptions
         * @return $this
         */
        public function setTemplateOptions($templateOptions)
        {
            $this->templateOptions = $templateOptions;
     
            return $this;
        }
     
        /**
         * Get mail transport
         *
         * @return TransportInterface
         * @throws LocalizedException
         */
        public function getTransport()
        {
            try {
                $this->prepareMessage();
                $mailTransport = $this->mailTransportFactory->create(['message' => clone $this->message]);
            } finally {
                $this->reset();
            }
     
            return $mailTransport;
        }
     
        /**
         * Reset object state
         *
         * @return $this
         */
        protected function reset()
        {
            $this->messageData = [];
            $this->templateIdentifier = null;
            $this->templateVars = null;
            $this->templateOptions = null;
            return $this;
        }
     
        /**
         * Get template
         *
         * @return TemplateInterface
         */
        protected function getTemplate()
        {
            return $this->templateFactory->get($this->templateIdentifier, $this->templateModel)
                ->setVars($this->templateVars)
                ->setOptions($this->templateOptions);
        }
     
        /**
         * Prepare message.
         *
         * @return $this
         * @throws LocalizedException if template type is unknown
         */
        protected function prepareMessage()
        {
            $template = $this->getTemplate();
            $content = $template->processTemplate();
            switch ($template->getType()) {
                case TemplateTypesInterface::TYPE_TEXT:
                    $part['type'] = MimeInterface::TYPE_TEXT;
                    break;
     
                case TemplateTypesInterface::TYPE_HTML:
                    $part['type'] = MimeInterface::TYPE_HTML;
                    break;
     
                default:
                    throw new LocalizedException(
                        new Phrase('Unknown template type')
                    );
            }
            $mimePart = $this->mimePartInterfaceFactory->create(['content' => $content]);
            $parts = count($this->attachments) ? array_merge([$mimePart], $this->attachments) : [$mimePart];
            $this->messageData['body'] = $this->mimeMessageInterfaceFactory->create(
                ['parts' => $parts]
            );
     
            $this->messageData['subject'] = html_entity_decode(
                (string)$template->getSubject(),
                ENT_QUOTES
            );
            $this->message = $this->emailMessageInterfaceFactory->create($this->messageData);
     
            return $this;
        }
     
        /**
         * Handles possible incoming types of email (string or array)
         *
         * @param string $addressType
         * @param string|array $email
         * @param string|null $name
         *
         * @return void
         * @throws InvalidArgumentException
         */
        private function addAddressByType(string $addressType, $email, ?string $name = null): void
        {
            if (is_string($email)) {
                $this->messageData[$addressType][] = $this->addressConverter->convert($email, $name);
                return;
            }
            $convertedAddressArray = $this->addressConverter->convertMany($email);
            if (isset($this->messageData[$addressType])) {
                $this->messageData[$addressType] = array_merge(
                    $this->messageData[$addressType],
                    $convertedAddressArray
                );
            }
        }
     
        /**
         * @param string|null $content
         * @param string|null $fileName
         * @param string|null $fileType
         * @return TransportBuilder
         */
        public function addAttachment(?string $content, ?string $fileName, ?string $fileType)
        {
            $attachmentPart = $this->partFactory->create();
            $attachmentPart->setContent($content)
                ->setType($fileType)
                ->setFileName($fileName)
                ->setDisposition(Mime::DISPOSITION_ATTACHMENT)
                ->setEncoding(Mime::ENCODING_BASE64);
            $this->attachments[] = $attachmentPart;
     
            return $this;
        }
    }

    Lastly, we have to create a call to the file as shown below.

    $this->transportBuilder->addAttachment($content, $fileName, 'application/pdf');

    That’s it. Now your email attachment issue should get resolved.


    How to add multiple product attribute sets programmatically in Magento 2?

    Magento provides the add product attribute set from the backend, but there is no way to add multiple attribute sets at once because, in the backend, we have to add one by one, so here I’m sharing the script for adding numerous sets at once.

    Here is the script which is directly use from Magento root path:

    <?php
    
    use MagentoFrameworkAppBootstrap;
    
    require __DIR__ . '/app/bootstrap.php';
    $params = $_SERVER;
    $bootstrap = Bootstrap::create(BP, $params);
    $obj = $bootstrap->getObjectManager();
    $state = $obj->get('MagentoFrameworkAppState');
    $state->setAreaCode('frontend');
    
    $objectManager = MagentoFrameworkAppObjectManager::getInstance(); 
    $resourceConnection = $objectManager->create('MagentoFrameworkAppResourceConnection');
    $attributeSet = $objectManager->create('MagentoEavModelEntityAttributeSet');
    $entity_type = $objectManager->create('MagentoEavModelEntityType');
    $productFactory = $objectManager->create('MagentoCatalogModelProductFactory');
    $setsArray = array("Cup", "Size", "BandSize", "Color"); //You have to put here your require attribute sets
    if (!empty($setsArray)) {
        $sortOrder = 200;
        foreach ($setsArray as $checkSet) {
            $connection = $resourceConnection->getConnection();
            $select = "SELECT * from eav_attribute_set WHERE attribute_set_name = '" . $checkSet . "'";
            $result = $connection->fetchAll($select);
            if (count($result) == 0) {
                $entityType = $entity_type->loadByCode('catalog_product');
                $defaultSetId = $productFactory->create()->getDefaultAttributeSetid();
                $data = [
                    'attribute_set_name' => $checkSet,
                    'entity_type_id' => $entityType->getId(),
                    'sort_order' => $sortOrder,
                ];
    
                $attributeSet->setData($data);
                $attributeSet->validate();
                $attributeSet->save();
                $attributeSet->initFromSkeleton($defaultSetId);
                $attributeSet->save();
            }
            $sortOrder++;
        }
    
        echo 'Attribute Sets Process Finished';
    }

    First, prepare the above script in any PHP file of your Magento root then run that PHP file by CLI, and script execution will be started.

    After finishing the file execution you can clean the Magento cache and see the result in the backend. All attribute sets will get successfully added.


    How to Remove cart item Automatically after 30 Minutes in Magento2?

    Step 1: create a “Registration.php” file inside our extension at the following path.

    Path: appcodeMagemonkeysRemovecart

    <?php
    MagentoFrameworkComponentComponentRegistrar::register(
        MagentoFrameworkComponentComponentRegistrar::MODULE,
        'Magemonkeys_Removecart',
        __DIR__
    );

    Step 2: After that,  create a “Module.xml” file inside extension etc folder. appcodeMagemonkeysRemovecartetc

    <?xml version="1.0"?>
    <config xmlns:xsi="http://www.w3.org/2001/XMLSchema-instance" xsi:noNamespaceSchemaLocation="urn:magento:framework:Module/etc/module.xsd">
        <module name="Magemonkeys_Removecart" setup_version="1.0.0" schema_version="1.0.0">
        </module>
    </config>

    Step 3: After that, create “crontab.xml” file inside extension etc folder. appcodeMagemonkeysRemovecartetc

    <config xmlns:xsi="http://www.w3.org/2001/XMLSchema-instance"
           xsi:noNamespaceSchemaLocation="urn:magento:module:Magento_Cron:etc/crontab.xsd">
        <group id="default">
            <job name="removecart" instance="MagemonkeysRemovecartCronRemovecart" method="getItemData">
                <schedule>* * * * *</schedule>
            </job>
        </group>
    </config>

    Step 4: Lastly, Create the “Removecart.php” file inside the Cron folder of extension. appcodeMagemonkeysRemovecartCron

    <?php
    namespace MagemonkeysRemovecartCron;
    
    class Removecart {
    
        /**
         * @var MagentoQuoteModelQuoteRepository
         */
        protected $quoteRepository;
    
        /**
         * @var MagentoQuoteModelResourceModelQuoteCollectionFactory
         */
        protected $quoteCollectionFactory;
    
        public function __construct(
            MagentoQuoteModelResourceModelQuoteCollectionFactory $quoteCollectionFactory,
            MagentoQuoteModelQuoteRepository $quoteRepository
        ) {
    
            $this->quoteCollectionFactory = $quoteCollectionFactory;
            $this->quoteRepository = $quoteRepository;
        }
        public function getItemData()
        {
            $fromTime = new DateTime('now', new DateTimezone('UTC'));
            $fromTime->sub(DateInterval::createFromDateString('30 minutes'));
    
            $fromDate = $fromTime->format('Y-m-d H:i:s');
            $quoteCollection = $this->quoteCollectionFactory->create();
    
            $quoteCollection
                ->addFieldToFilter('created_at', ['lteq' => $fromDate]);
    
            if($quoteCollection->getSize() >0){
                foreach ($quoteCollection as $quote)
                {
                    $quoteFullObject = $this->quoteRepository->get($quote->getId());
                    $quoteFullObject->delete();
                }
            }
    
    
        }
    }

    Run below command in your command prompt

    php bin/magento cron:install

    php bin/magento cron:run

    Every 30 minutes, the cron is executed. If there is an item available in the cart, it will be then removed, automatically!


    Magento 2: add breadcrumbs in customer account dashboard page

    If you need breadcrumbs in customer account dashboard page then follow below instructions

    You need to override customer_account_index.xml layout file in your theme and add the below code.

    <referenceBlock name="breadcrumbs">
     <action method="addCrumb">
     <argument name="crumbName" xsi:type="string">home</argument>
     <argument name="crumbInfo" xsi:type="array">
     <item name="title" xsi:type="string">Home</item>
     <item name="label" xsi:type="string">Home</item>
     <item name="link" xsi:type="string">/</item>
     </argument>
     </action>
     <action method="addCrumb">
     <argument name="crumbName" xsi:type="string">Account</argument>
     <argument name="crumbInfo" xsi:type="array">
     <item name="title" xsi:type="string">Account</item>
     <item name="label" xsi:type="string">Account</item>
     </argument>
     </action>
     </referenceBlock>

    Add contact us as a top menu in Magento

    Step 1: For this, you have to create a small module. In that module, you have to create di.xml on the below path where we will define the plugin.

    Path : appcodeVortexCravensetcdi.xml

    You have to add the below code in the di.xml file

    <?xml version="1.0"?>
    <config xmlns:xsi="http://www.w3.org/2001/XMLSchema-instance" xsi:noNamespaceSchemaLocation="urn:magento:framework:ObjectManager/etc/config.xsd">
    	<type name="MagentoThemeBlockHtmlTopmenu">
            <plugin name="contact_us_menu" type="VortexCravensPluginTopmenu" sortOrder="1" />
        </type>
    </config>

    Step 2: Create a plugin on the below path and add the below-mentioned code into that file.

    Path : appcodeVortexCravensPluginTopmenu.php

    Code:

    <?php 
    namespace VortexCravensPlugin;
    use MagentoFrameworkDataTreeNodeFactory;
    class Topmenu
    {
        protected $nodeFactory;
        protected $_storeManager;
        protected $_pageFactory;
        protected $_urlBuilder;
     
        public function __construct(
            NodeFactory $nodeFactory,
            MagentoCmsModelPageFactory $pageFactory,
            MagentoStoreModelStoreManagerInterface $storeManager,
            MagentoFrameworkUrlInterface $urlBuilder
        ) {
            $this->nodeFactory = $nodeFactory;
            $this->_pageFactory = $pageFactory;
            $this->_storeManager = $storeManager;
            $this->_urlBuilder = $urlBuilder;
        }
        public function beforeGetHtml(
            MagentoThemeBlockHtmlTopmenu $subject,
            $outermostClass = '',
            $childrenWrapClass = '',
            $limit = 0
        ) {
    
            $node = $this->nodeFactory->create(
                [
                    'data' => [
                        'name' => __('Contact Us'),
                        'id' => 'contact-us',
                        'url' =>  $this->_urlBuilder->getUrl('contact'),
                        'has_active' => false,
                        'is_active' => false // (expression to determine if menu item is selected or not)
                    ],
                    'idField' => 'id',
                    'tree' => $subject->getMenu()->getTree()
                ]
            );
            $subject->getMenu()->addChild($node);
        }
        
     
    }

    By doing these steps the contact us menu will get added in the top menu.