If you don’t want your name under the old-fashioned store owner then you must integrate Highrise with your Magento store and if you are looking for how to integrate Highrise with Magento 2, this article is for you.
First, you need to understand what Highrise is?

Highrise is a CRM solution which includes the function of managing customer communications and storing all customer information. It can also track business transactions and it also allows you to import data from your Magento store.
Lets integrate Highrise with Magento 2
There are 4 steps for integration
- Step 1: Create Zapier account
- Step 2: Create Highrise account
- Step 3: Integrate Magento 2
- Step 4: Integrate Highrise with Magento 2
Step 1: Create Zapier account
- Signup Zapier
Step 2: Create Highrise account
- Signup Highrise
- When you log in into Zapier, select Make a Zap to start integrating.

Step 3: Integrate Magento 2
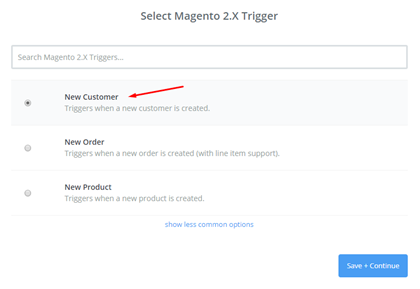
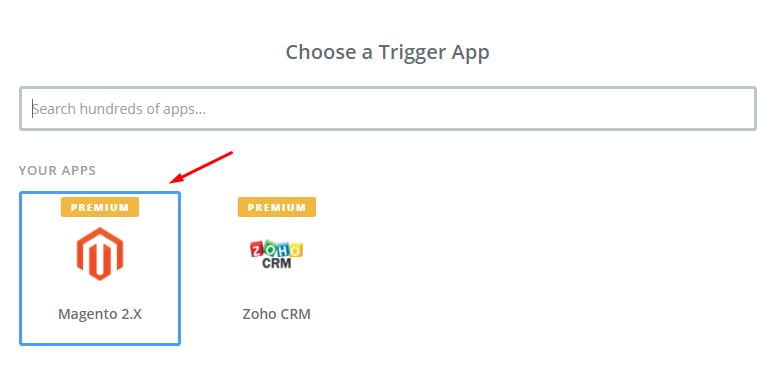
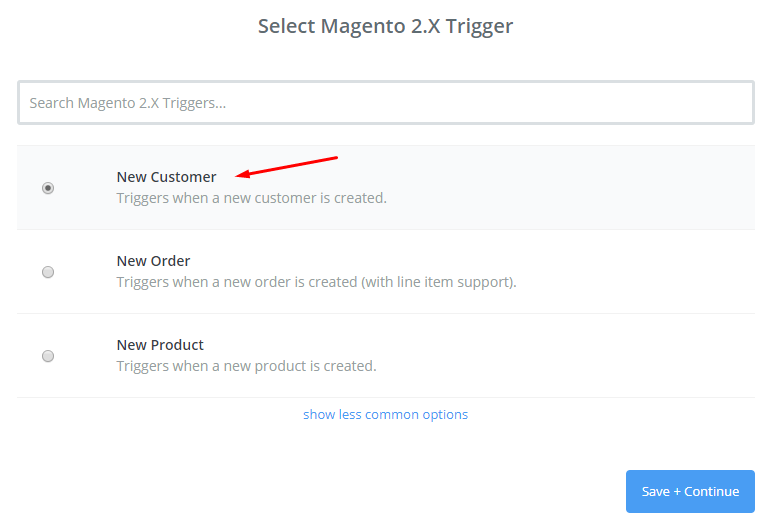
- Here you need to select a Trigger App for integrating with your Magento 2 store.
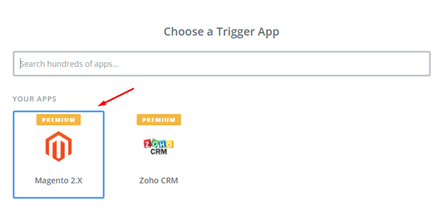
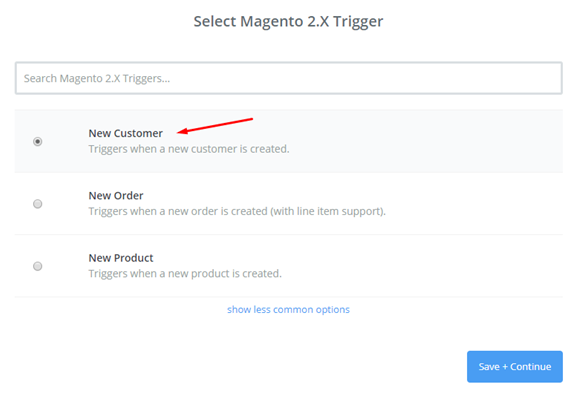
- Now here, select Magento 2.x Trigger in the drop-down list such as new customer, then save + continue

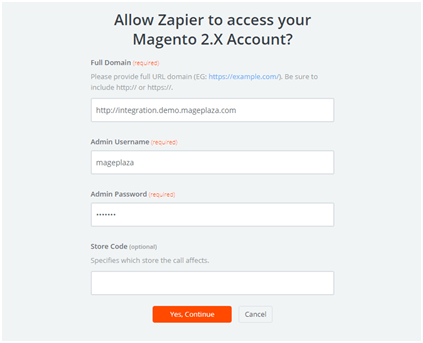
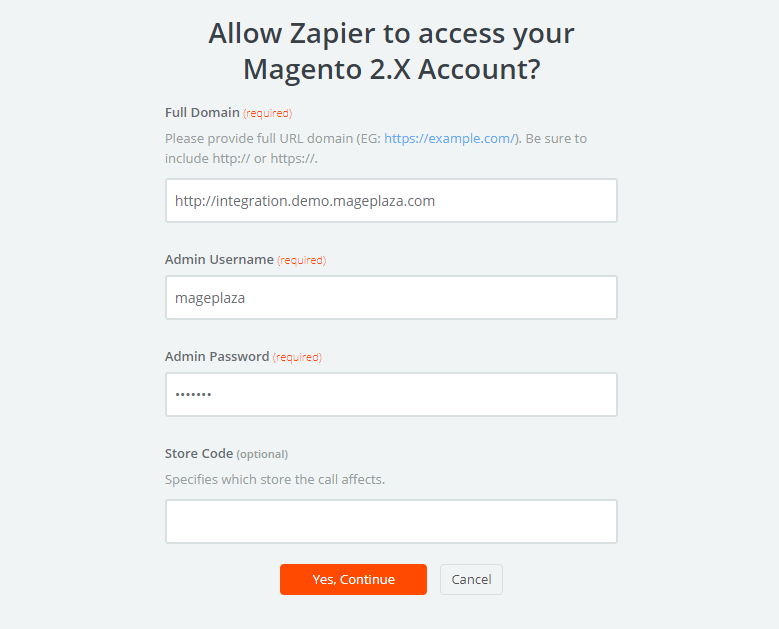
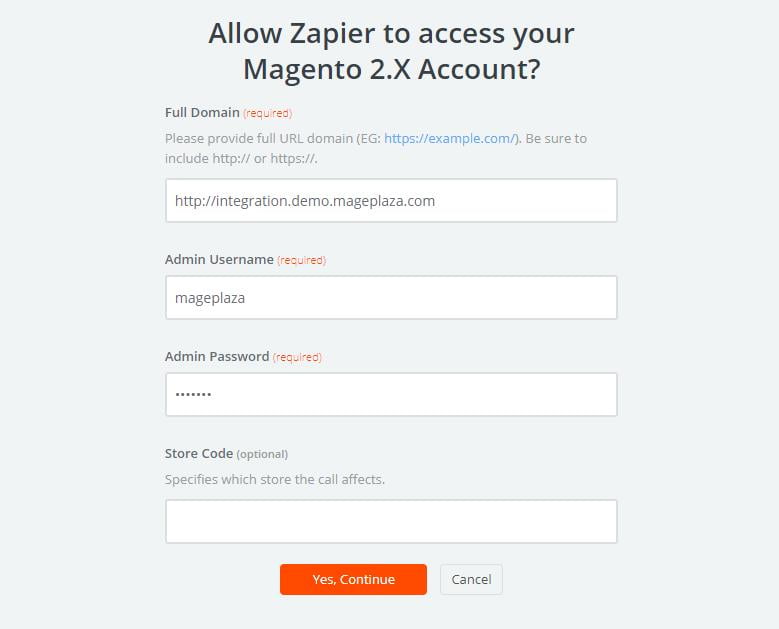
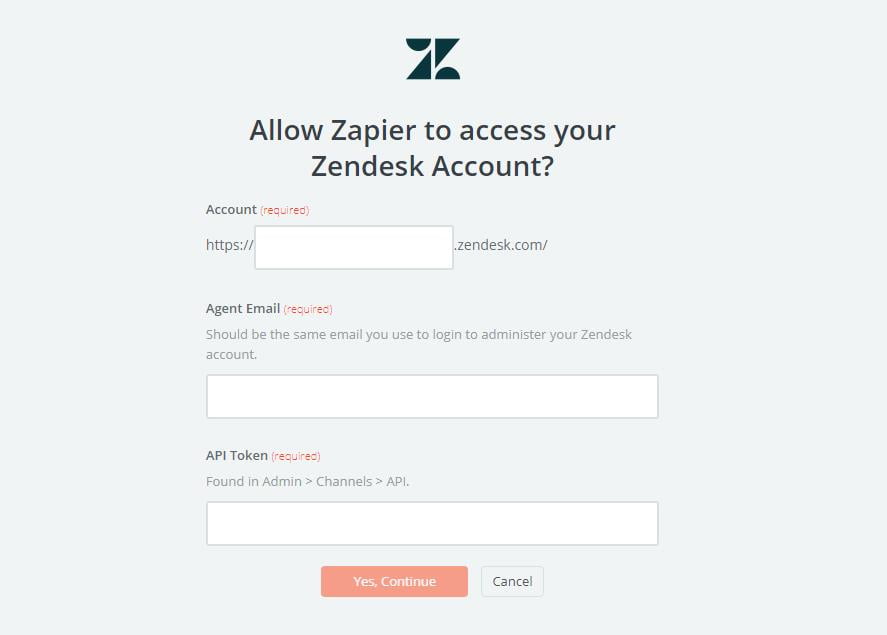
- Then you have to connect an account to select Magento 2.x Account for that enter full domain, admin username and admin password of your Magento 2.x store as an image below:

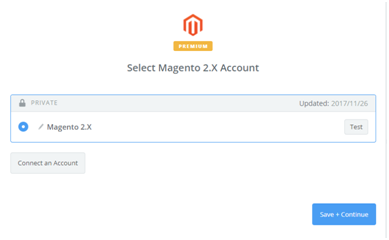
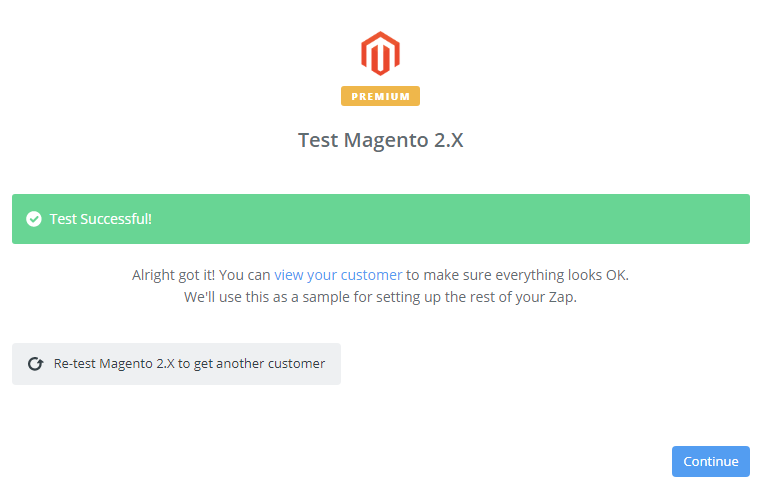
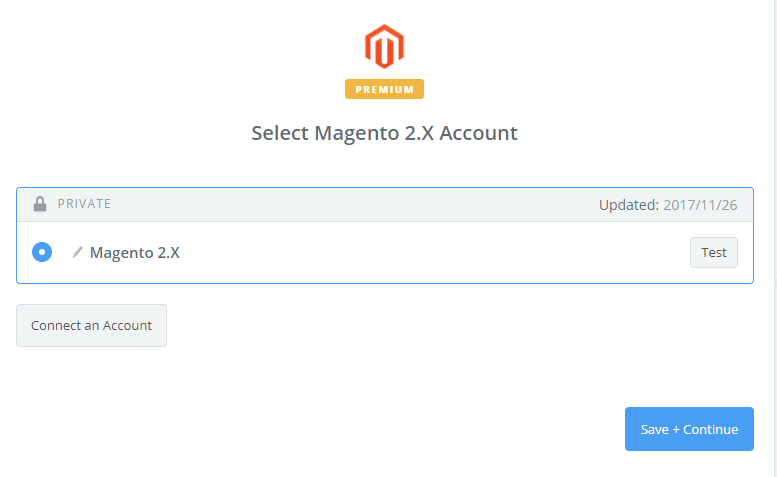
- After creating your Magento 2.x account, your screen will display as the following image, and then click on Save + Continue:

- Awesome, you have successfully tested Magento 2.x. Please continue doing for the next step.
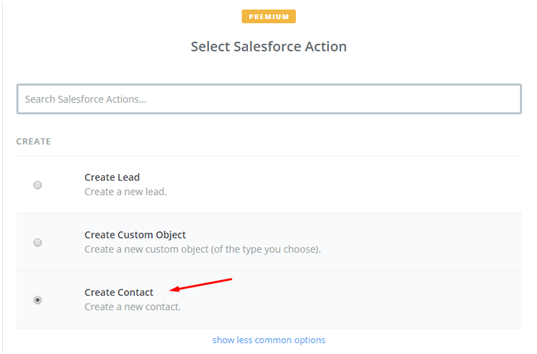
Step 4: Integrate Highrise with Magento 2
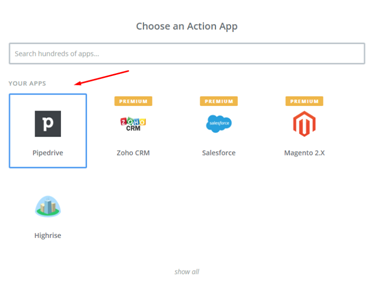
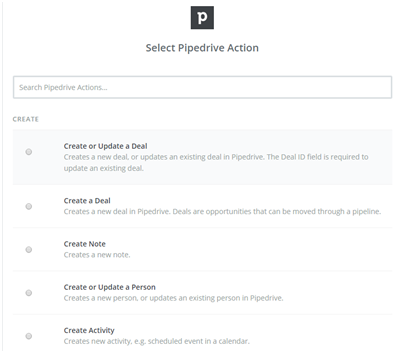
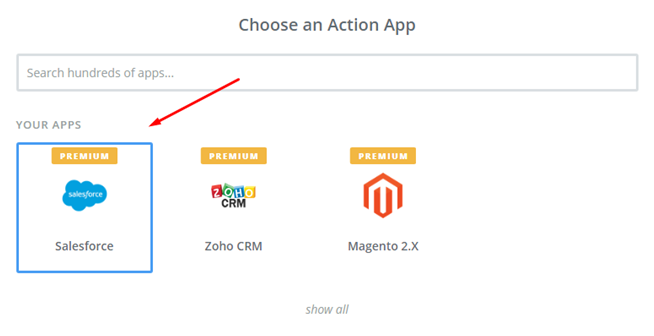
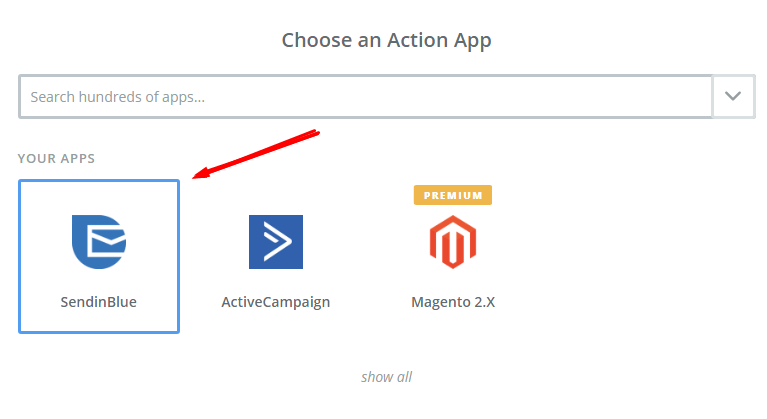
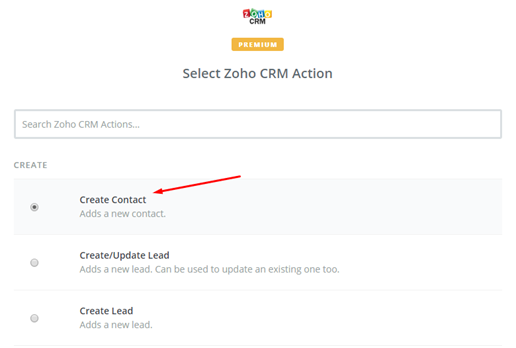
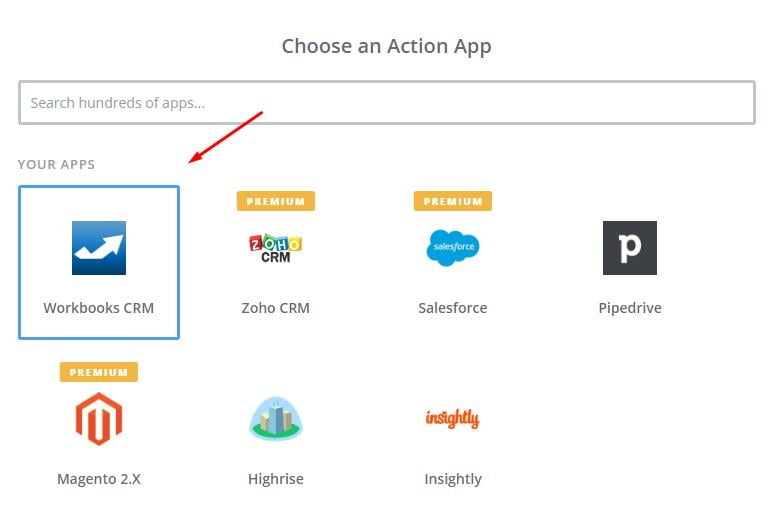
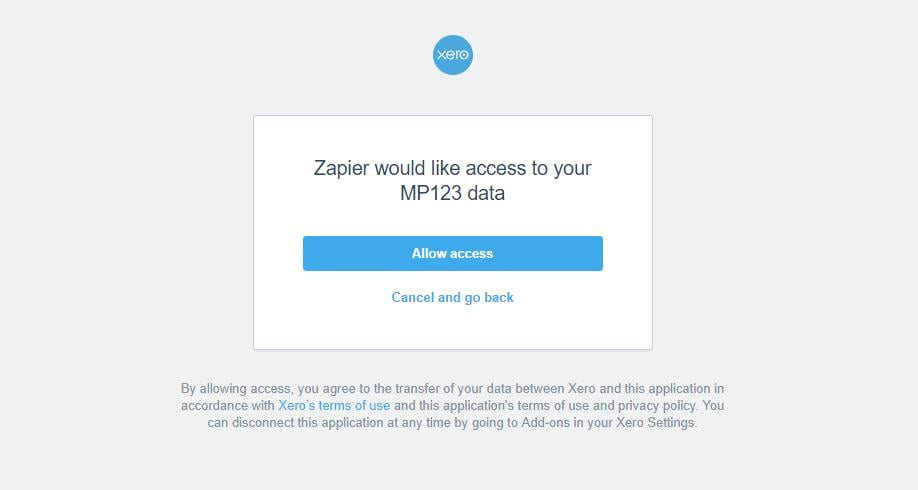
- From Appfield, you have to choose Highrise

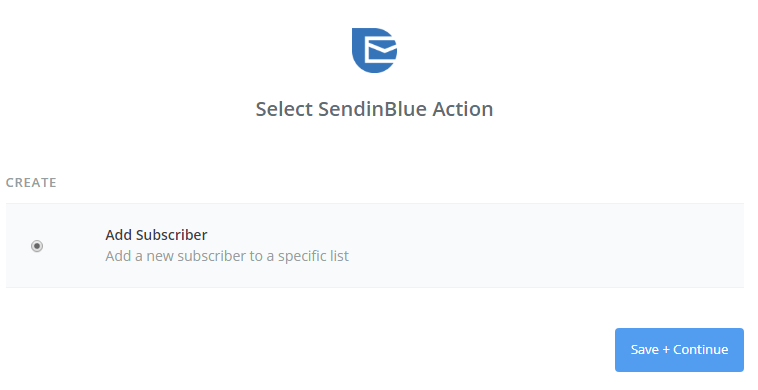
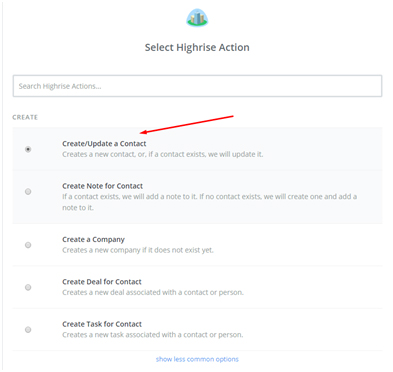
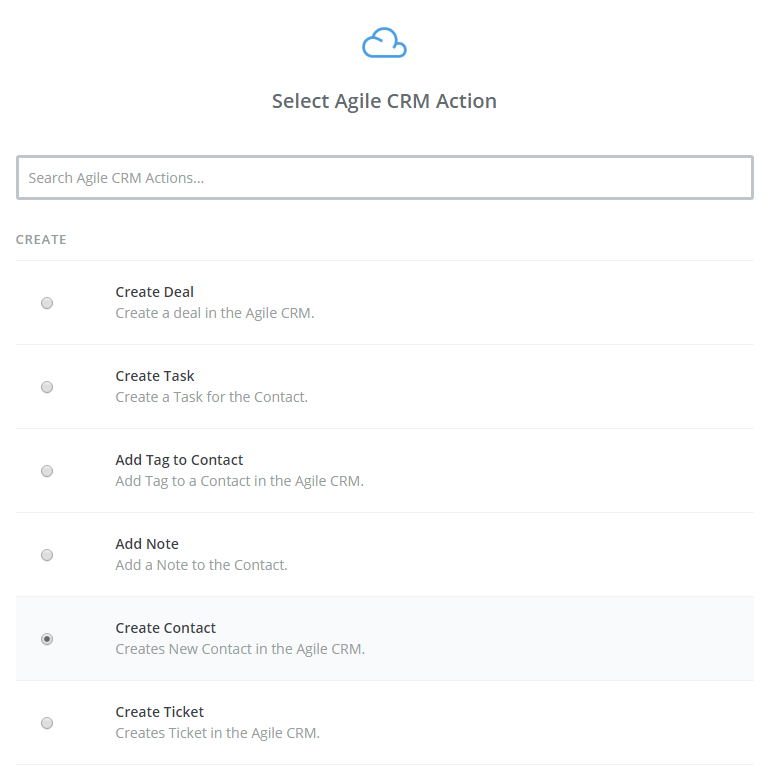
- Now, in select Highrise Action( as you can see below), you have to select on create/update contact and then click on continue
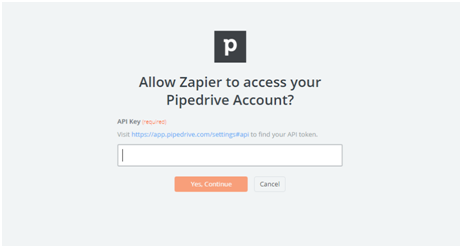
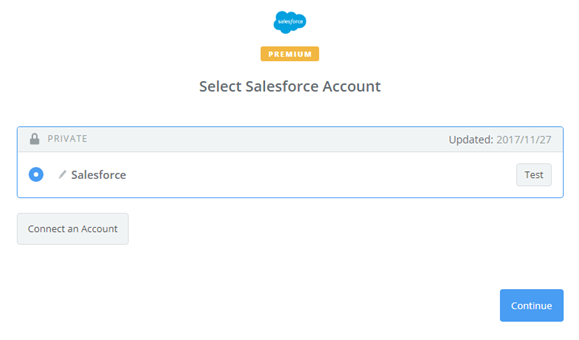
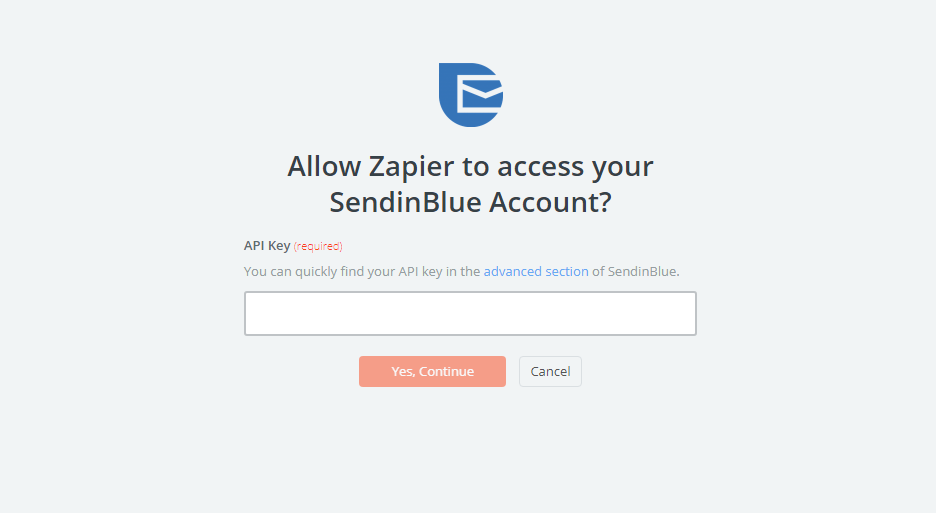
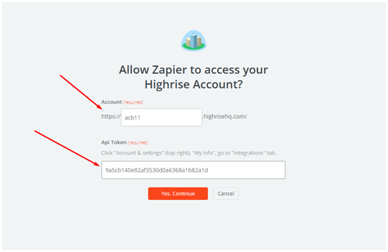
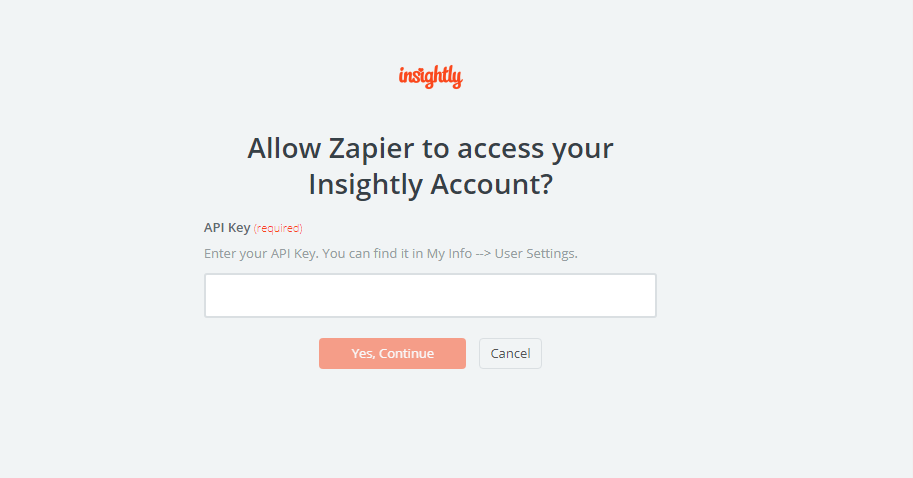
- Next, click on Connect an Account and then follow the instructions.
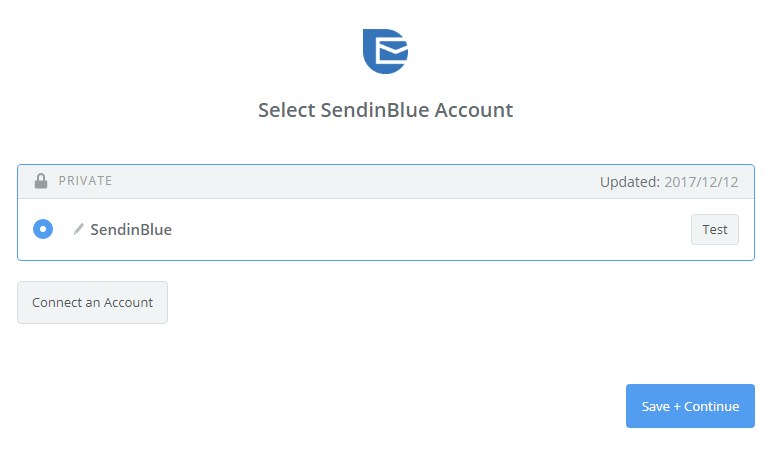
- Fill all required information in this page and then click on Save + Continue
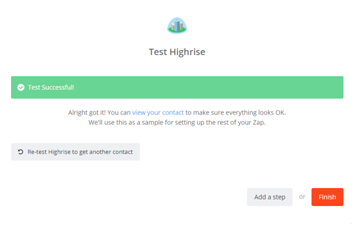
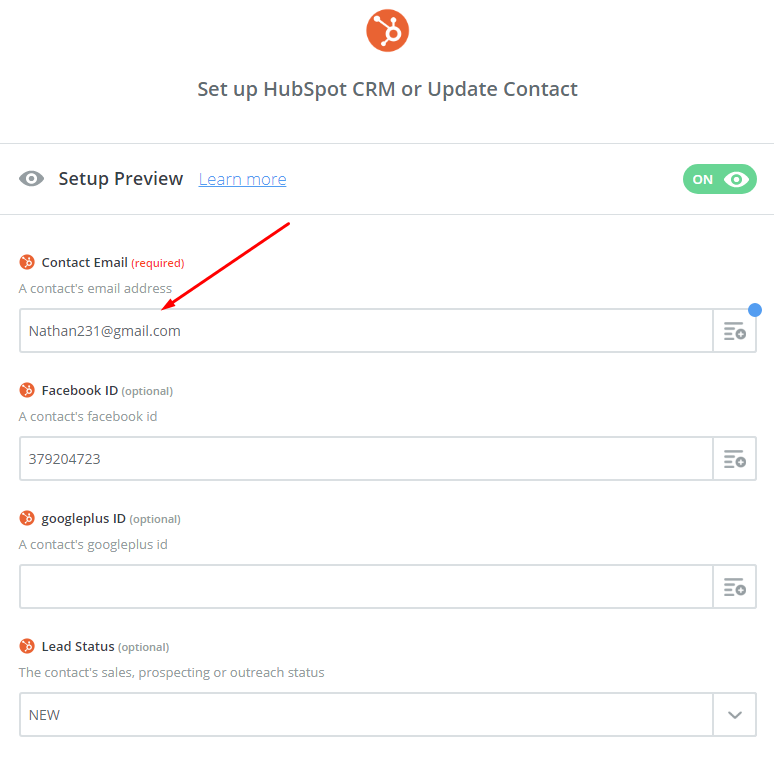
- Further, in this step, you need to set up a template. Create Highrise contact where you need to enter all necessary information. And after filling in the information click on the continue box.
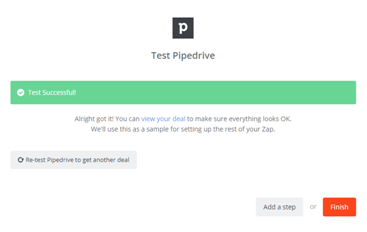
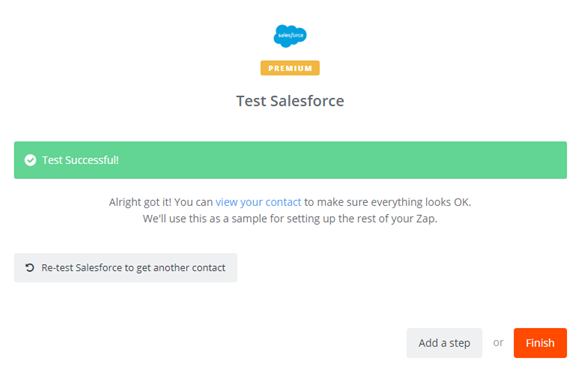
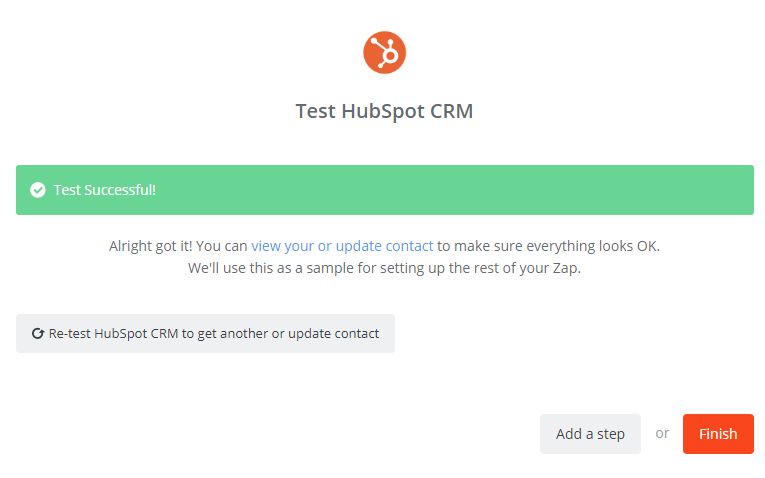
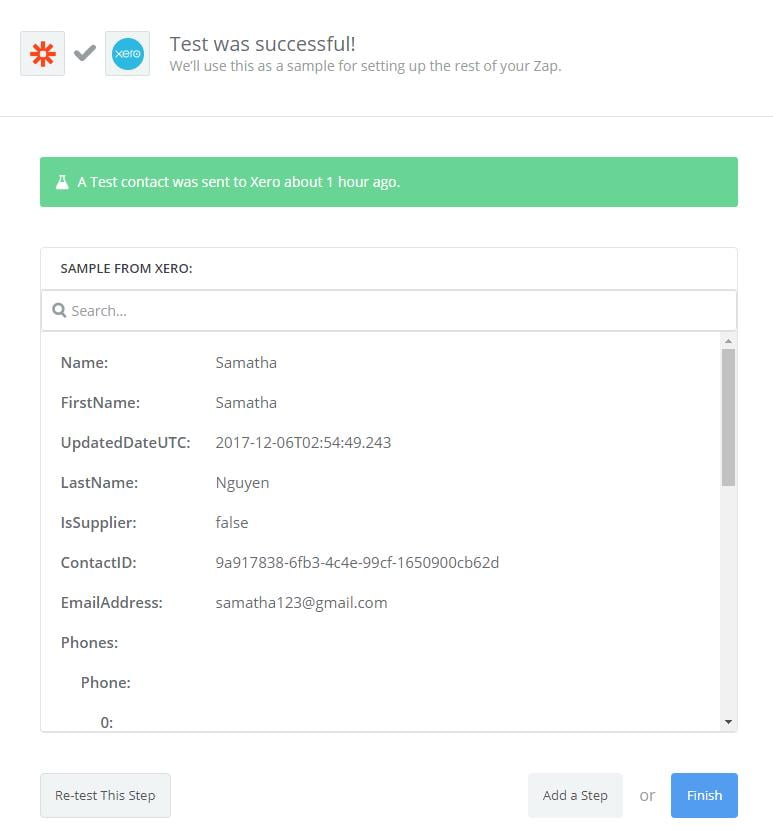
- Great, you have tested Highrise successfully.
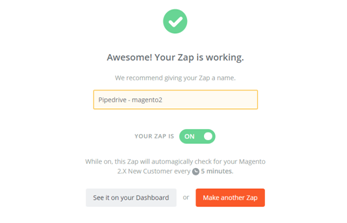
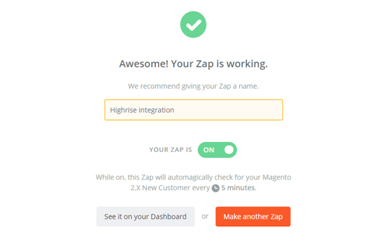
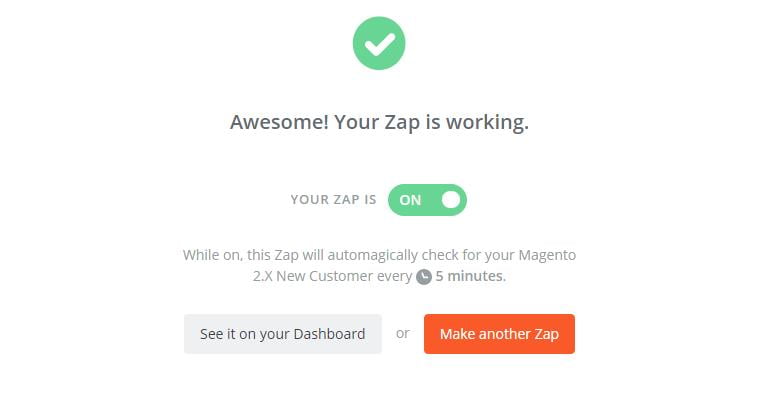
- Lastly, click on Finish and set the name of your Zap
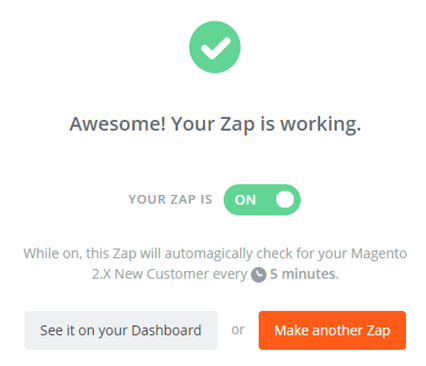
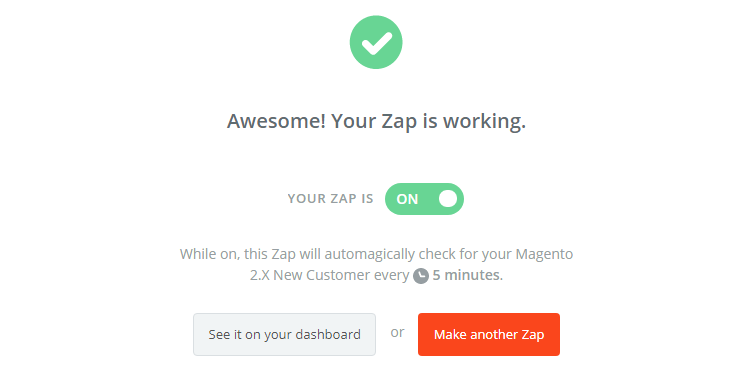
- Now, you have tested Highrise successfully. Finally, click on Finish and then set the name of your zap to complete.
- Wonderful! Your Zap is working and from now it will auto-check your Magento 2.x new customer.
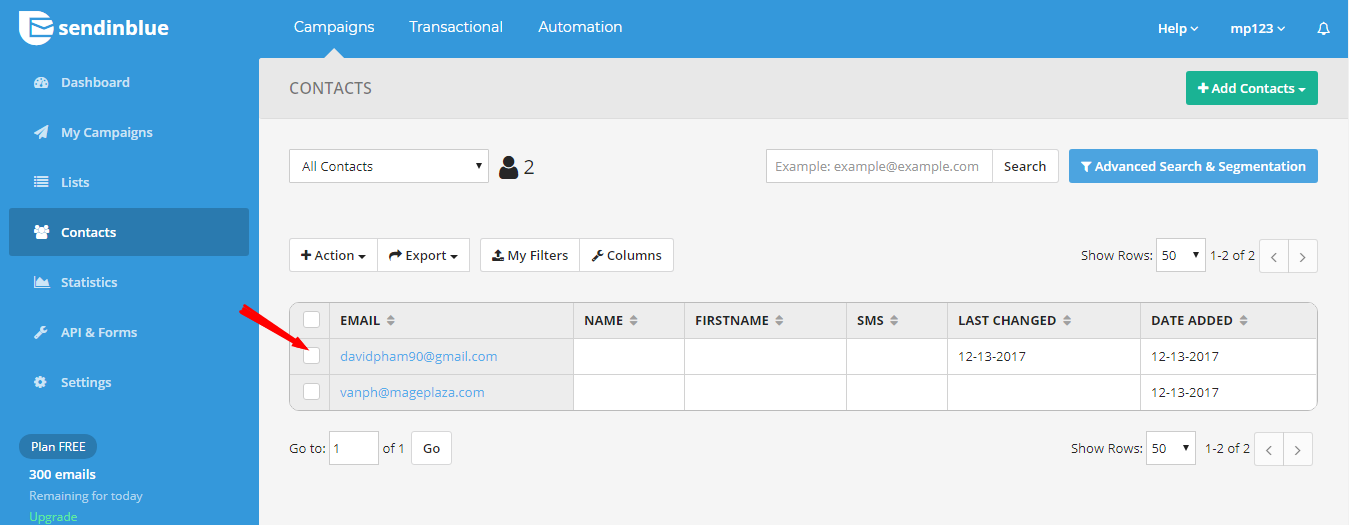
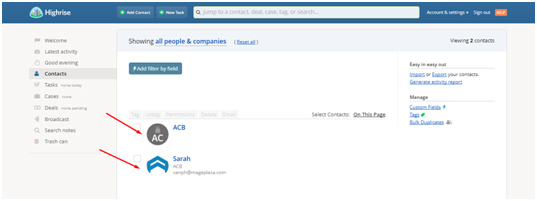
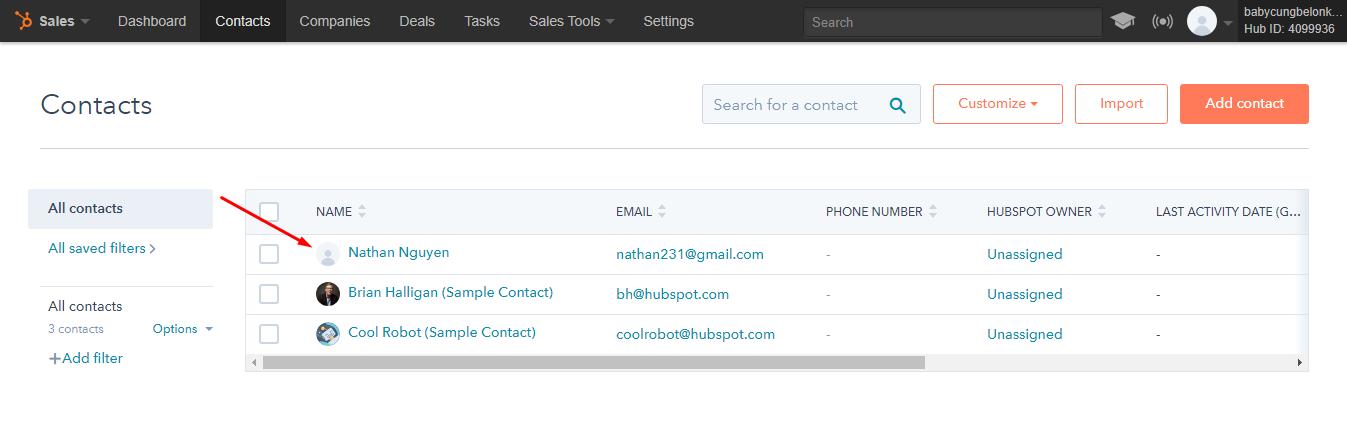
- Lastly, here is the contact that you have just created.
With this, we come to the end of the tutorial on How to integrate Highrise with Magento 2.
Highrise CRM is a great tool. It will help your business perform better. It saves your time in managing customer data as well as helps increase the conversion rate dramatically. If you still failed to integrate, then hire Mage Monkeys for the Magento integration service.


 We all know the importance of HubSpot CRM to E-commerce stores. It is one of the leading CRM platforms on the market and if you want to know how to integrate HubSpot CRM then you are at a perfect place.
 HubSpot CRM makes it easy to create contact and company profiles. It is a smart application and includes all the features needed for e-commerce stores. You can monitor every transaction; control all your business operations.
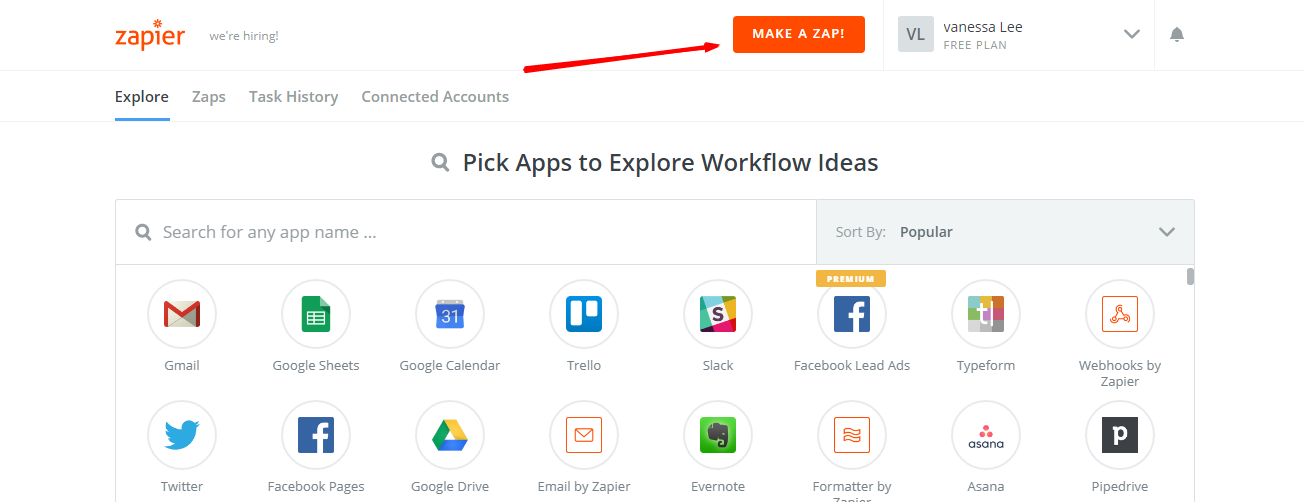


 Many of our Ecommerce merchant partners have very little to engage with a potential buyer. But With Agile CRM all your queries are resolved. It comes with great benefits and in this article we will share the integration between Magento 2 and Agile CRM.


 There are number of customer relationship management software on the market; but, we suggest you choose Insightly if your business is really small. It has the best features and you will surely be satisfied with this software.


 This is how the integration is done between Insightly and Magento 2. You really need to try this amazing software to make your business run more efficiently. If you still failed to integrate, then hire Mage Monkeys for the