There are number of business owners in the field of Ecommerce face problem when it comes to integration between ActiveCampaign and Magento 2. So we thought to solve your query and explain you in detail in our blog.
But first…
What is ActiveCampaign?
A friendly platform for business owners who need to stay in touch with their customers as well as attract more new customers to their store. This tool lets you to create beautiful and attractive emails, use social media and apply automated marketing techniques with CRM functionality.
Moreover, this solution provides businesses to create automated marketing processes, and automatically watch customer behaviour. ActiveCampaign deserves a top solution for creating marketing campaigns for Magento 2 stores.
Now let’s understand the integration.
How to integrate ActiveCampaign with Magento 2
To integrate ActiveCampaign
- Step 1: Sign up the Zapier account
- Step 2: Sign up the ActiveCampaign account
- Step 3: Integrate Magento 2.x
- Step 4: Integrate ActiveCampaign for your Magento 2 store via Zapier
Step 1: Sign up the Zapier account
- Signup Zapier
Step 2: Sign up the ActiveCampaign account
- Signup ActiveCampaign
When you log in into Zapier, choose Make a Zap to start integrating

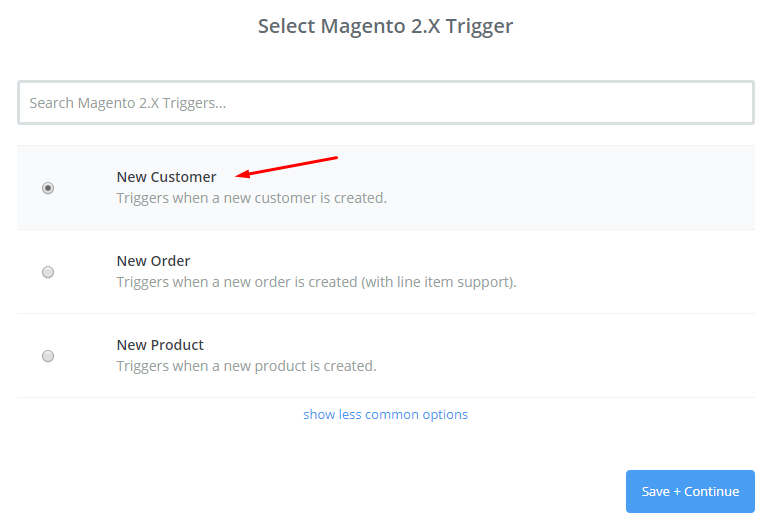
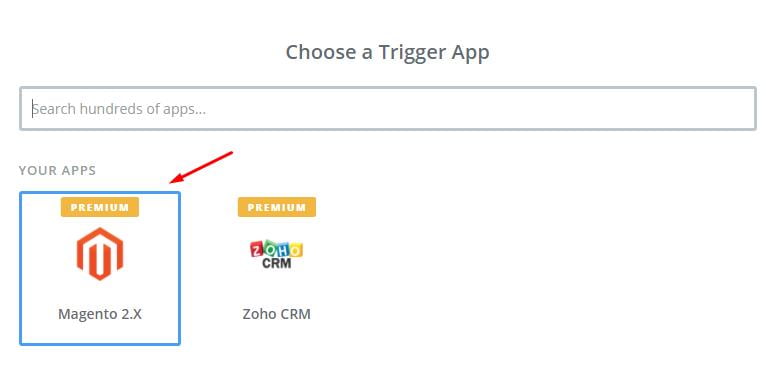
Step 3: Integrate Magento 2.x
In this step, choose Magento 2.x so that Zapier can get all data from your store.

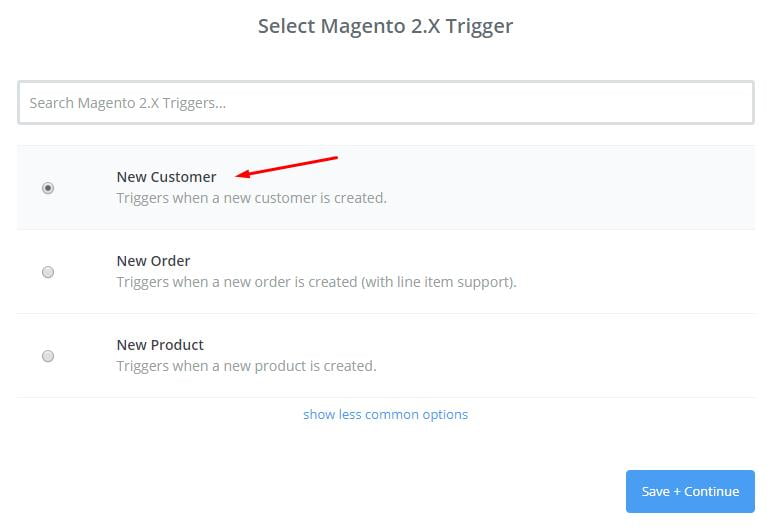
Then, opt for New Customer in select Magento 2.x Trigger field and then click on Save+continue.

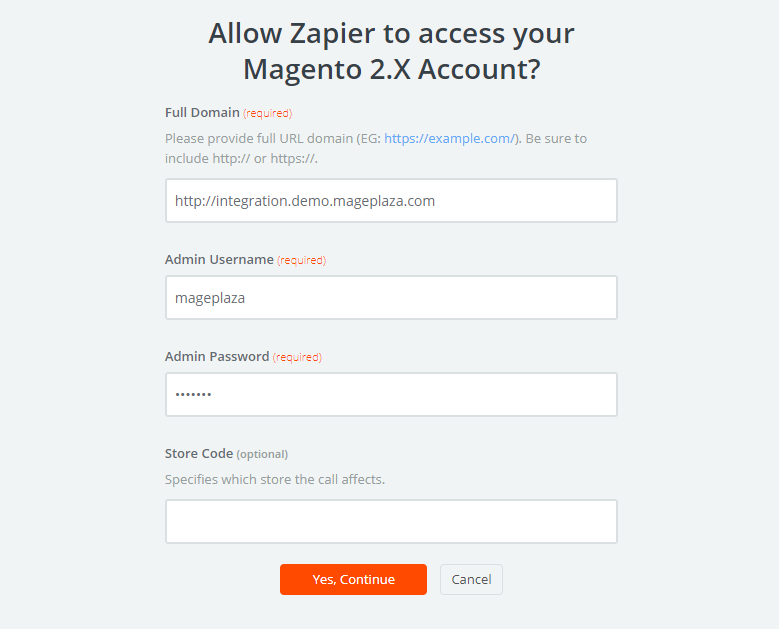
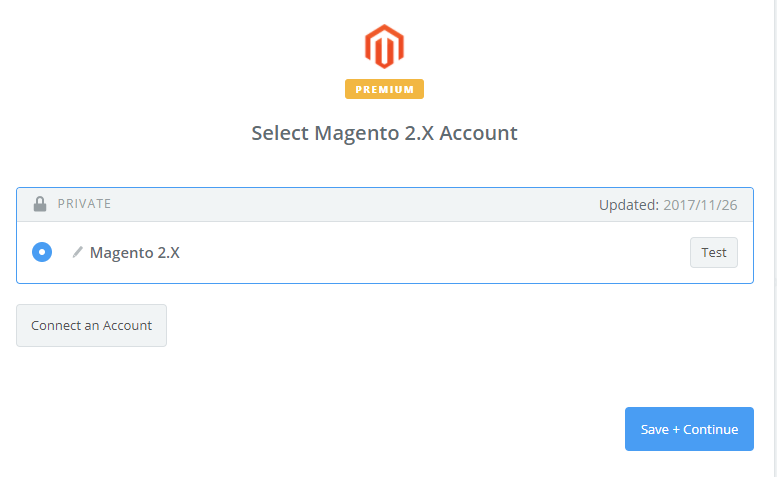
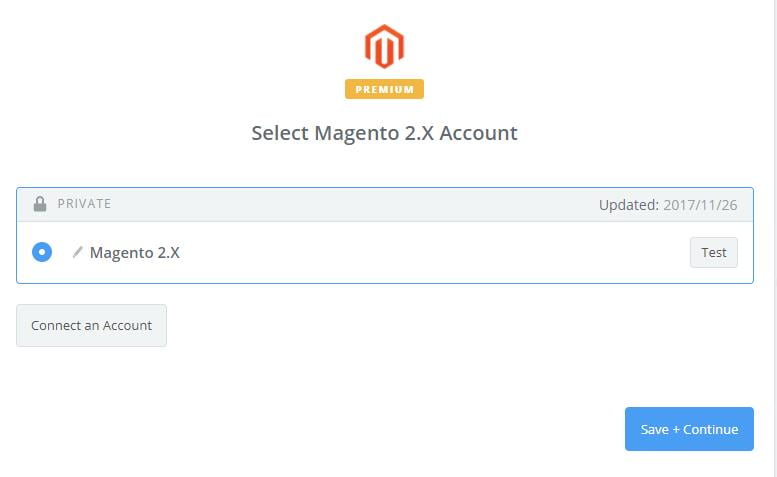
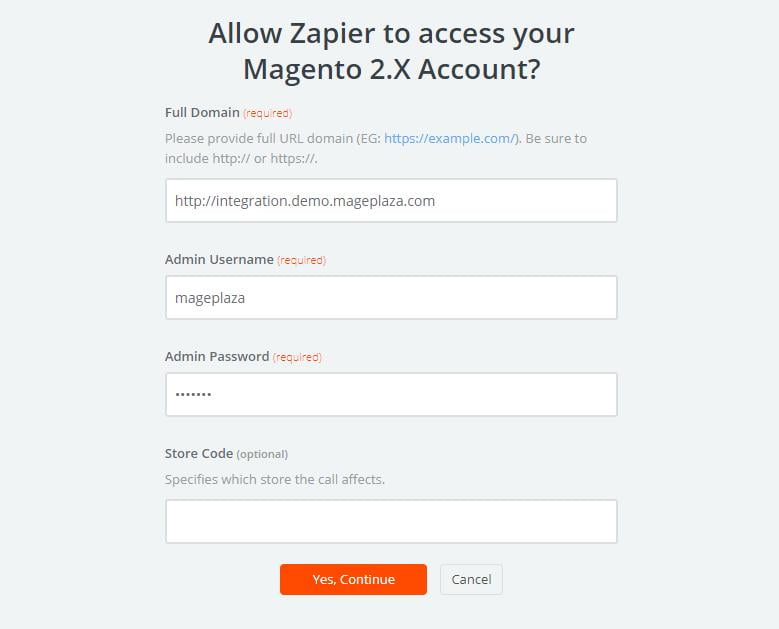
After that, here you have to connect an Account in select Magento 2.x account field. In this step, please enter full domain, admin username and admin password of your Magento 2 store as the following image:

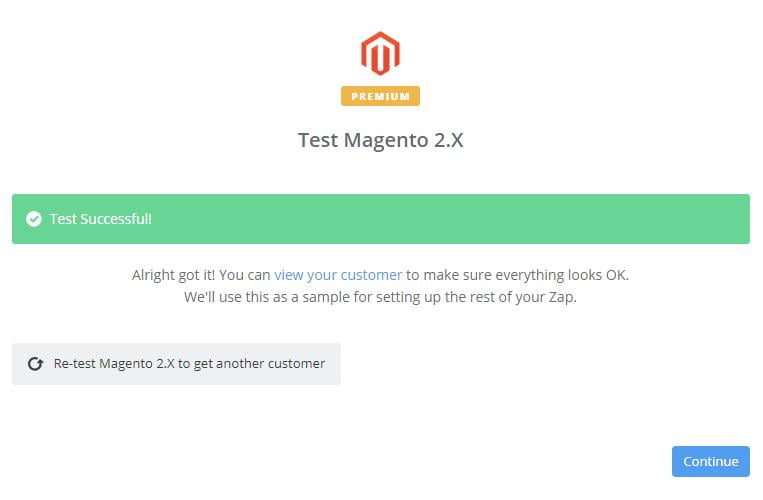
After creating your Magento 2.x account, the screen will display as shown in the image below. Then, choose Save + Continue.

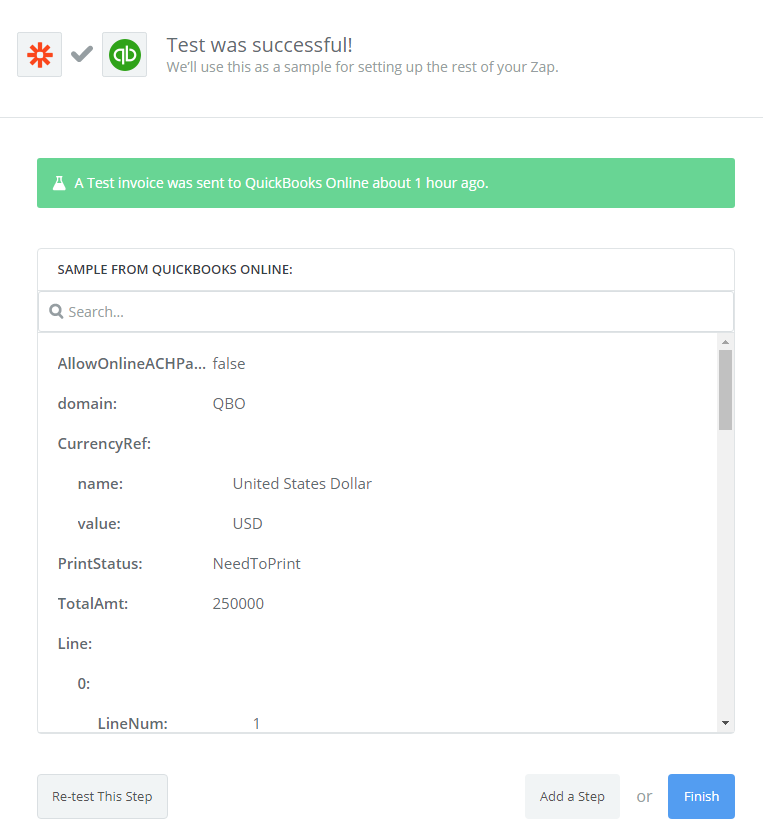
Great! You have just tested Magento 2.x successfully. Now click on continue for the next step.

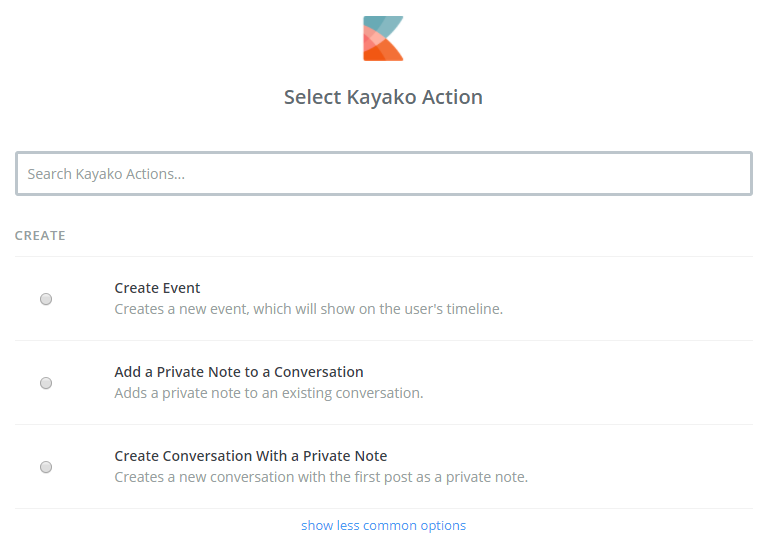
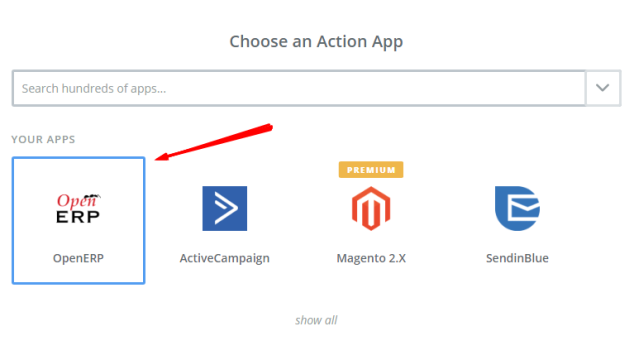
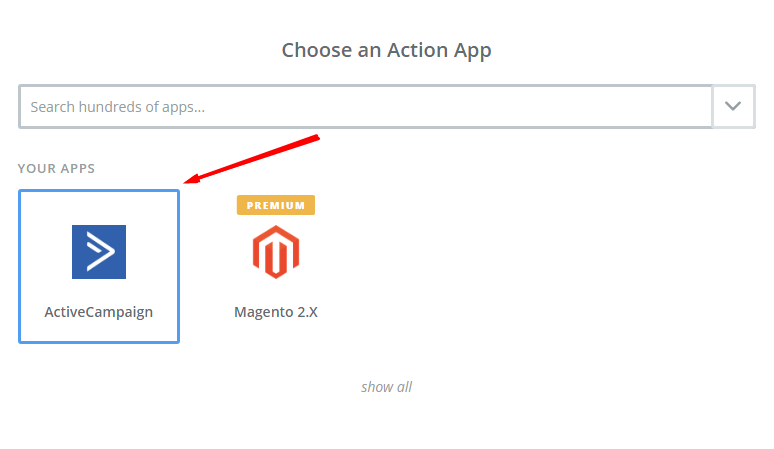
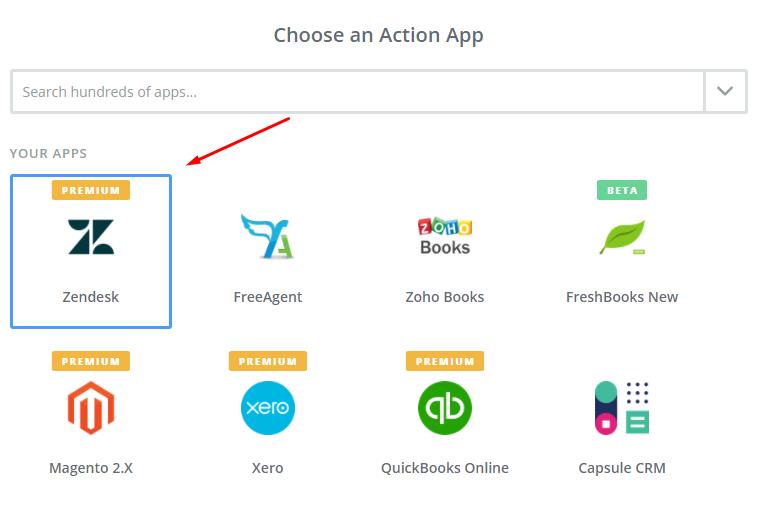
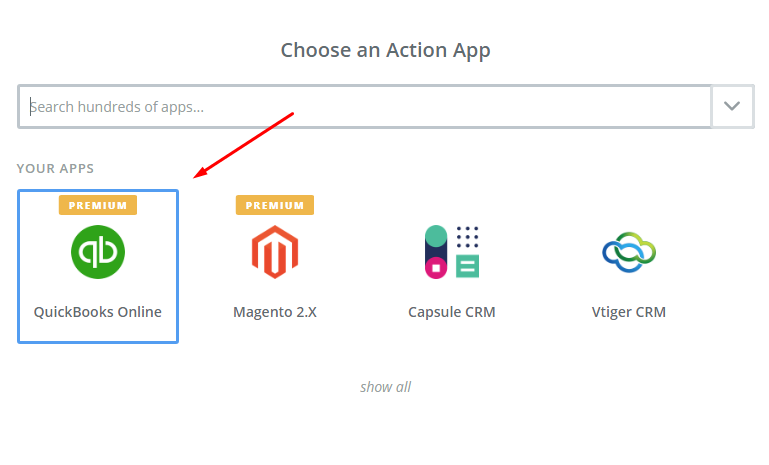
Step 4: Integrate ActiveCampaign
In Choose an Action App field, choose ActiveCampaign and click on Continue.
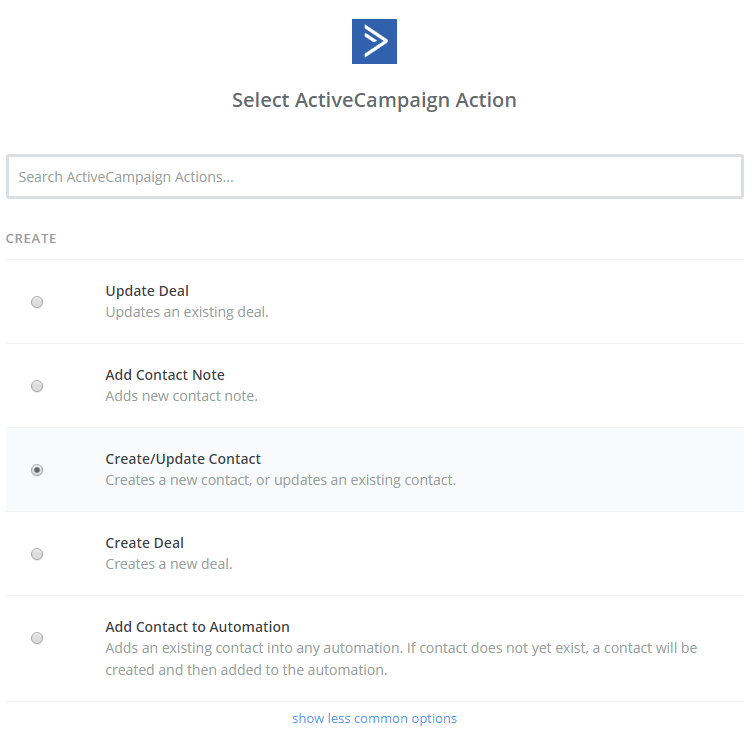
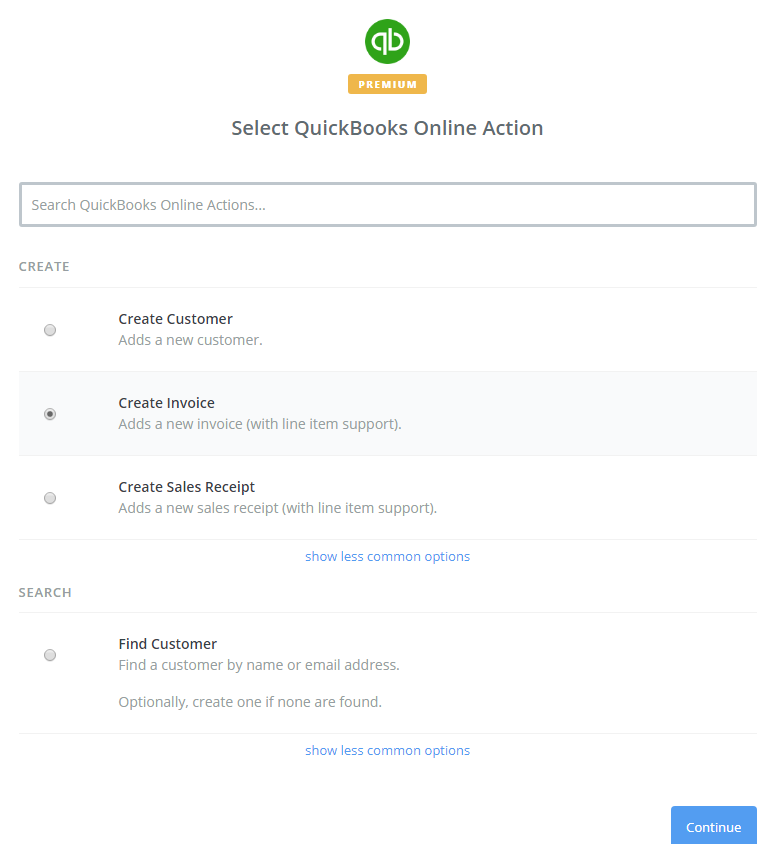
Further, you need to choose one of the options in the drop-down list of Select ActiveCampaign Actionfield. After selecting, click on continue.
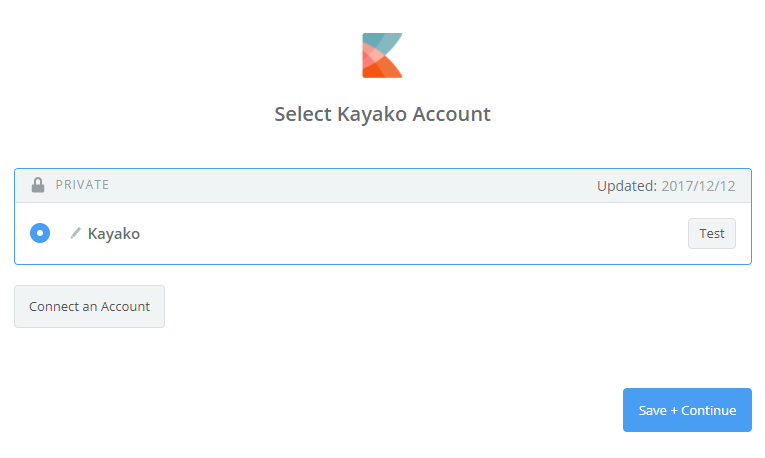
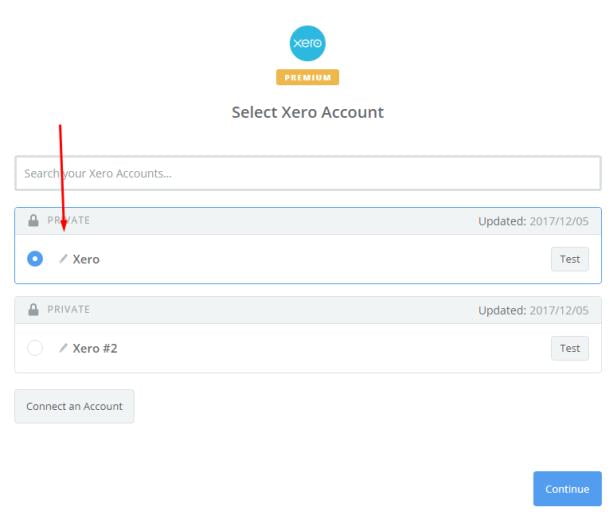
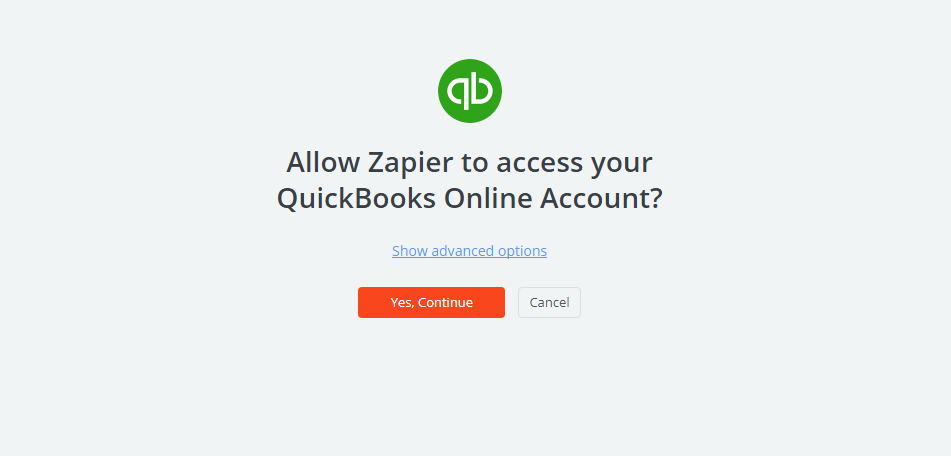
Next, you have to select ActiveCampaign account. Please click on Connect an Account. Then, your screen will display the image below:
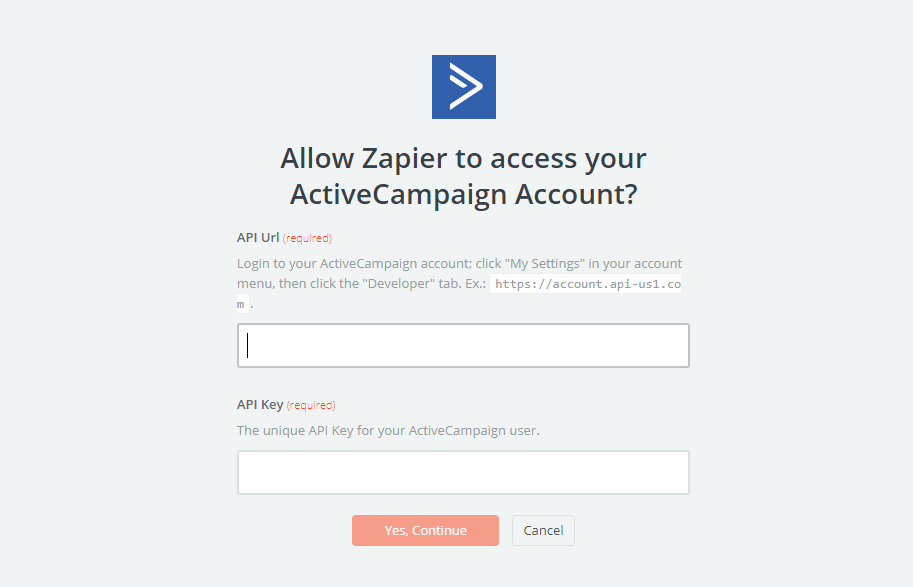
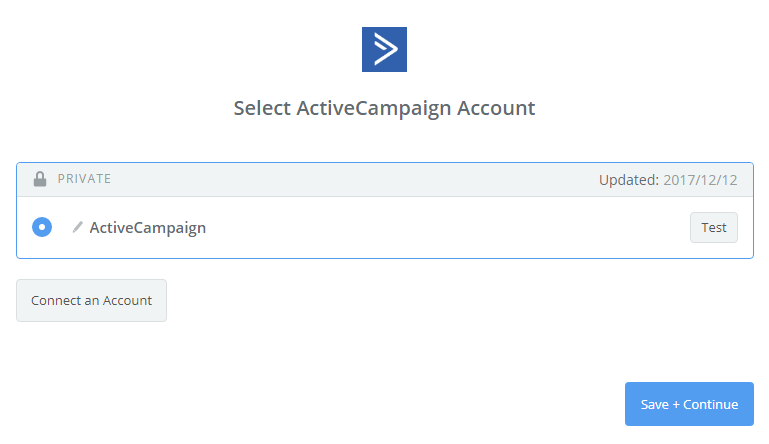
Here you have to login to your ActiveCampaign account. Then, click on My Settings in your account menu and choose developer to find API URL as well as API Key. After you have just entered, your PC will show the account that you have just created. Now, click on Continue.

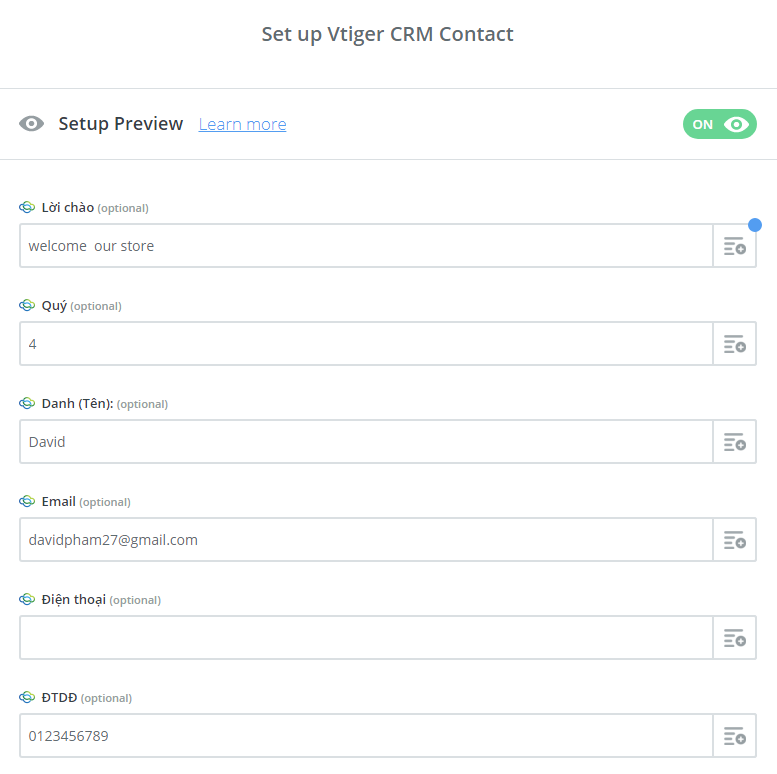
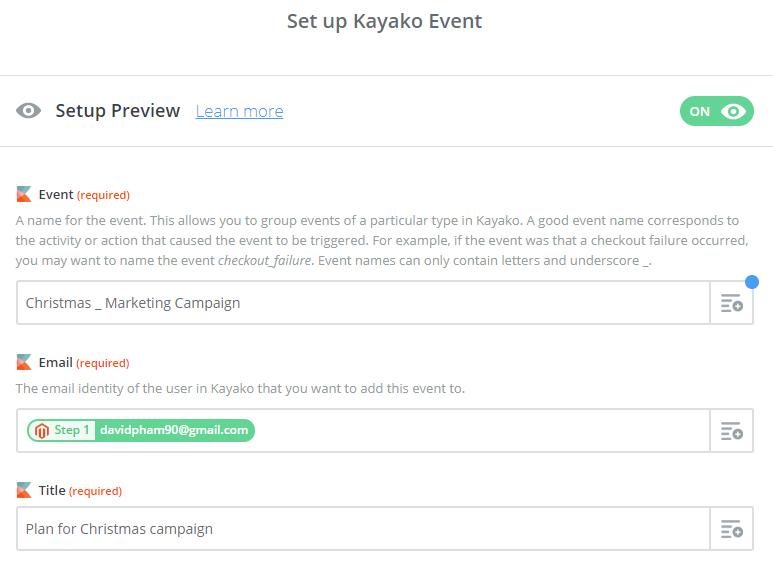
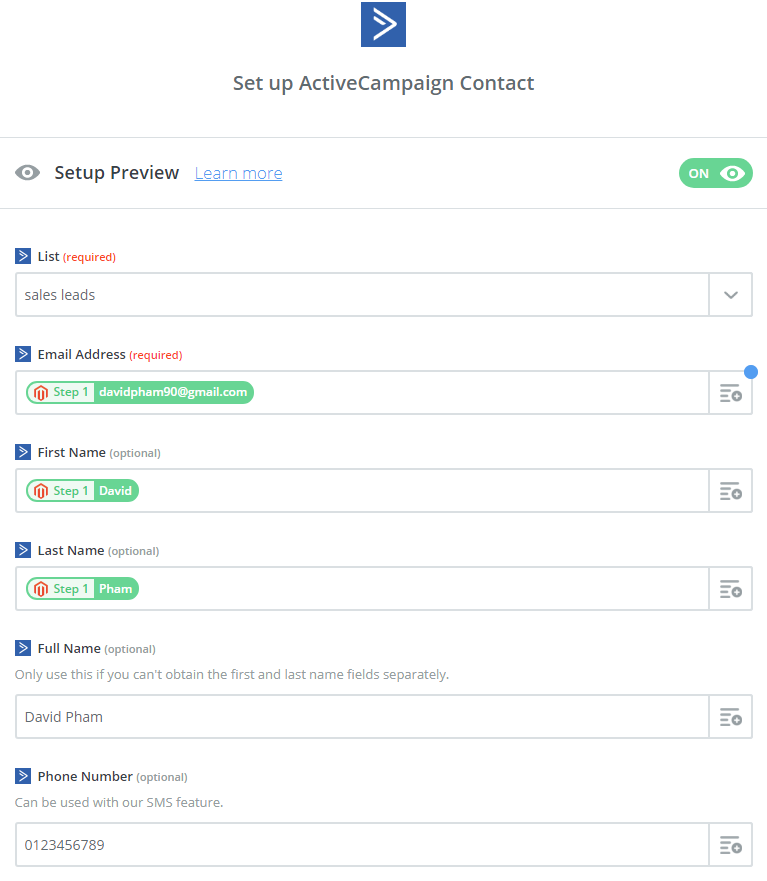
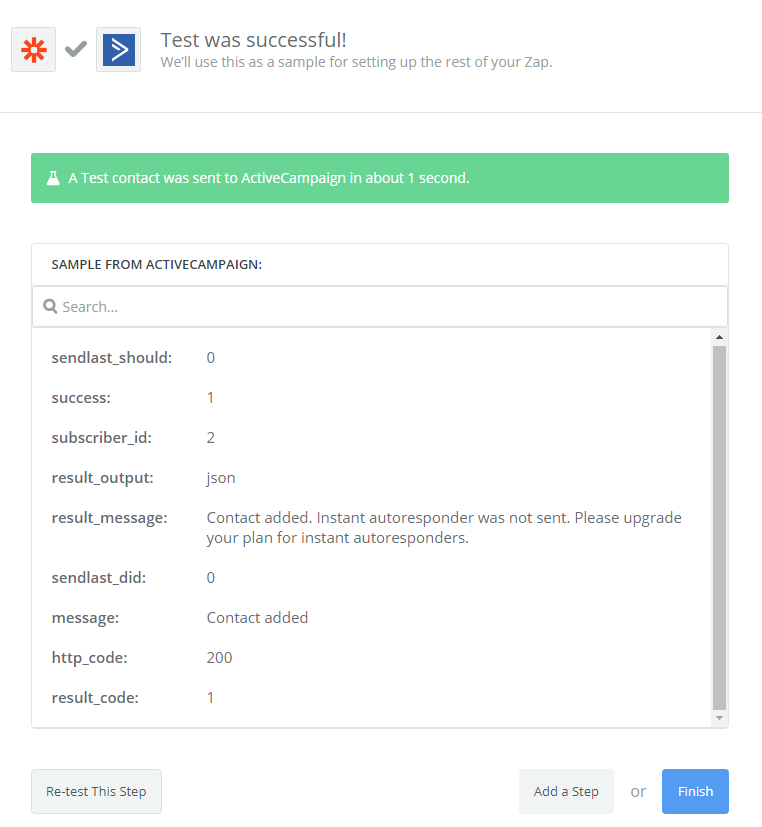
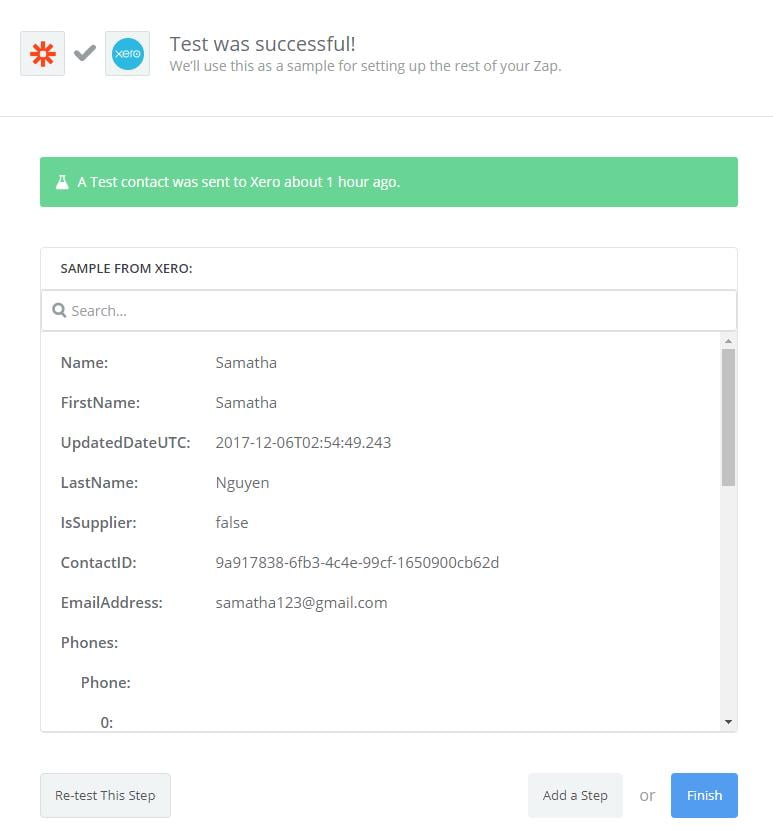
Next, you must Set up ActiveCampaign Contact. Enter all requirement as well as the information of customers like Email Address, First Name, Last Name that you have created from your Magento 2 store, then choose continue box.
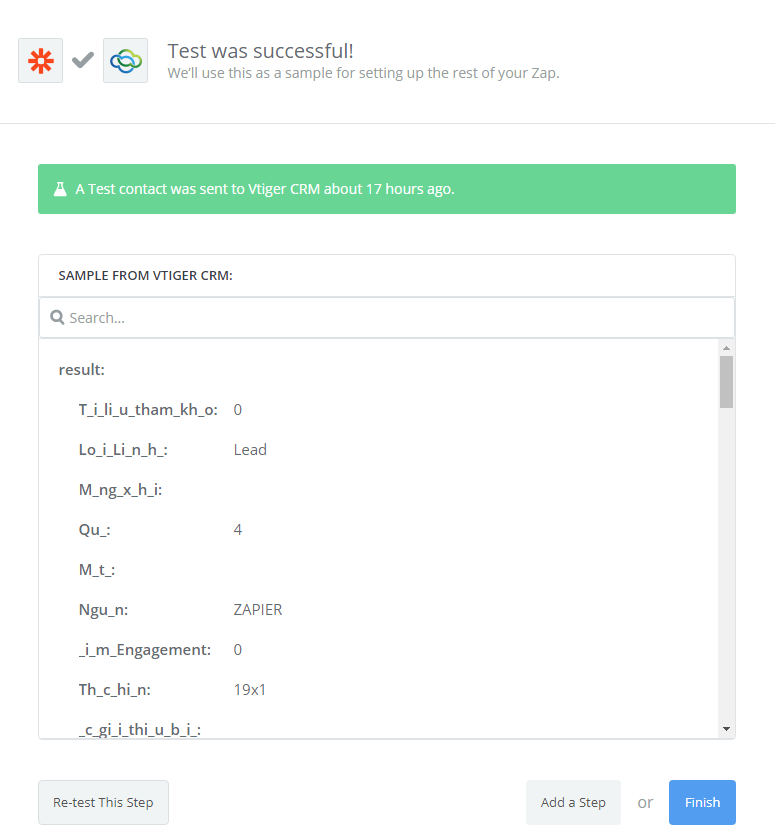
Great! The contact has been sent to your ActiveCampaign account.
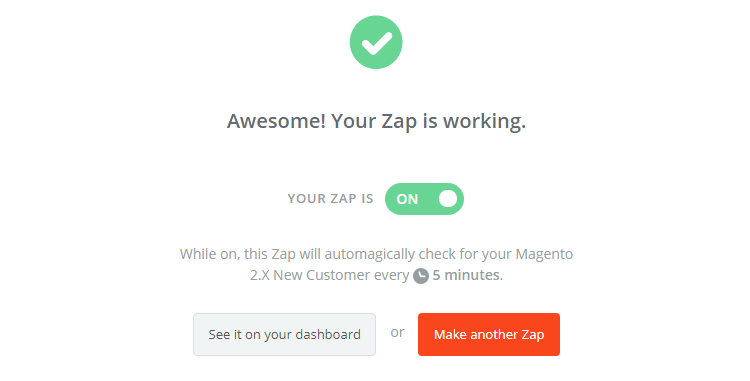
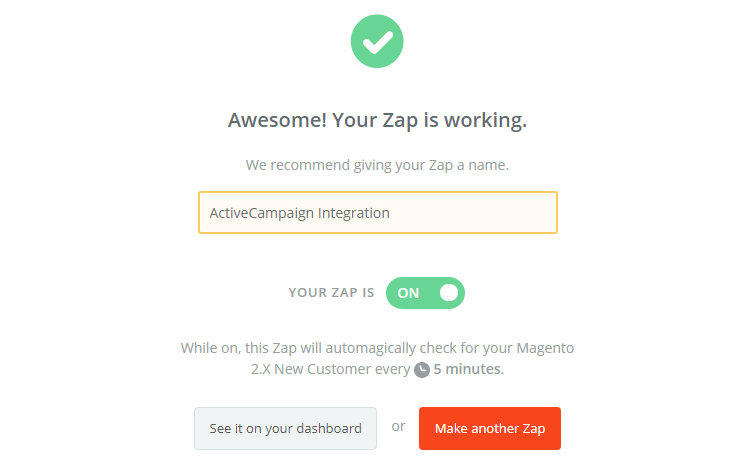
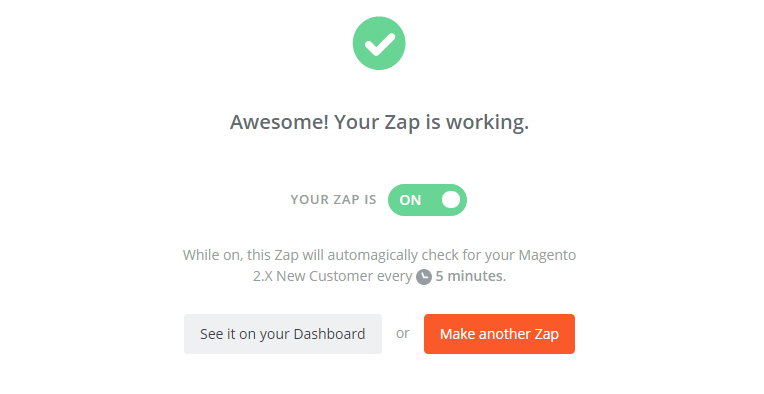
Congratulations, you have tested ActiveCampaign successfully. Now click on Finish and set the name your zap to complete.
This is how your Zap will work and it will auto-check for your Magento 2.x new customer.

This is how the integration of Activecampaign with Magento 2 via Zapier is done.
Now it’s time for you to try integrating it with your Magento 2 store! If you still failed to integrate, then hire Mage Monkeys for the Magento integration service.

 We all need easy to use software to handle our finance and what’s better than FreeAgent. So, in this blog we will explore how to integrate FreeAgent with Magento 2. Our steps will make your integration easier.


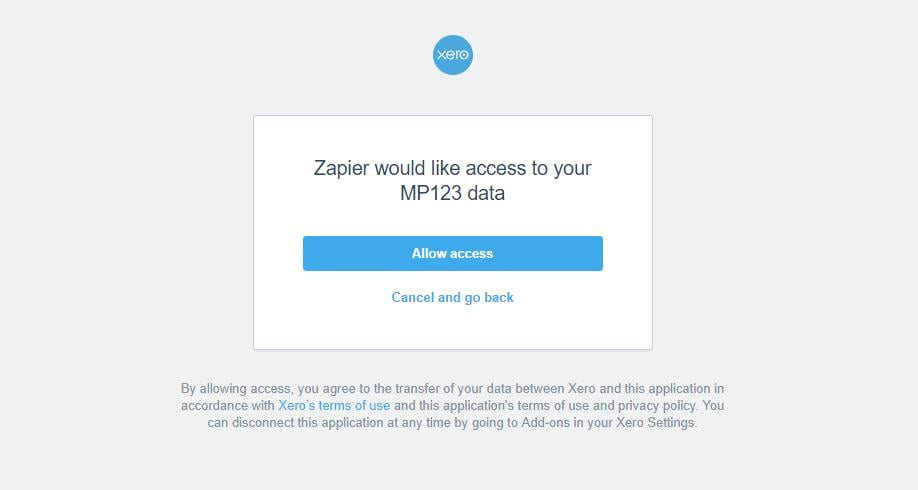
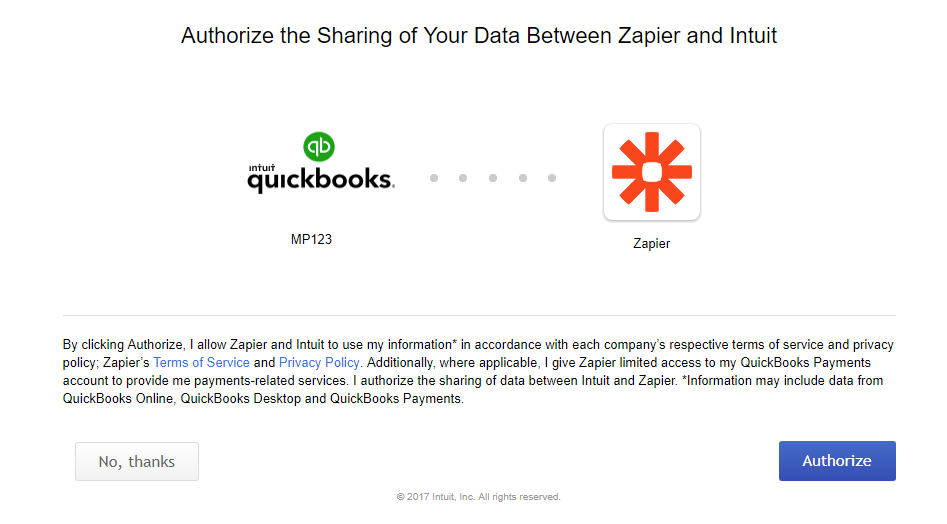
 In this step, sign in your account and click on Approve App! box. Immediately, your PC will show the following page for you to approve access.
 Now, this is the account that you have just created. Please click on Save + Continue.


 We all need an excellent application which can handle our accounting easily but which? Well the answer is QuickBooks Online. It’s an effective application for your business.


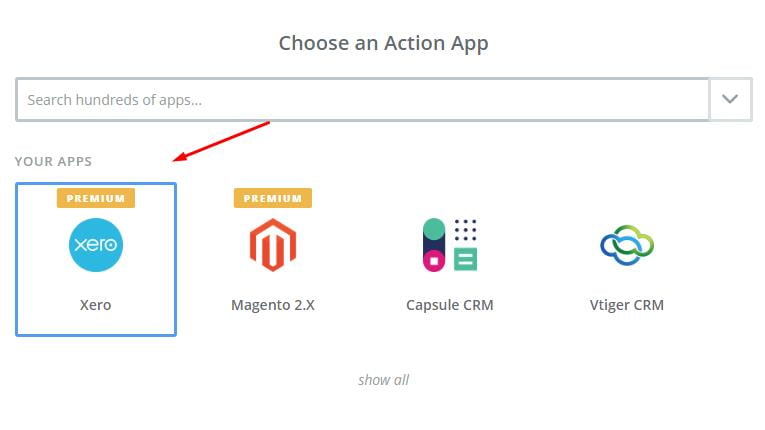
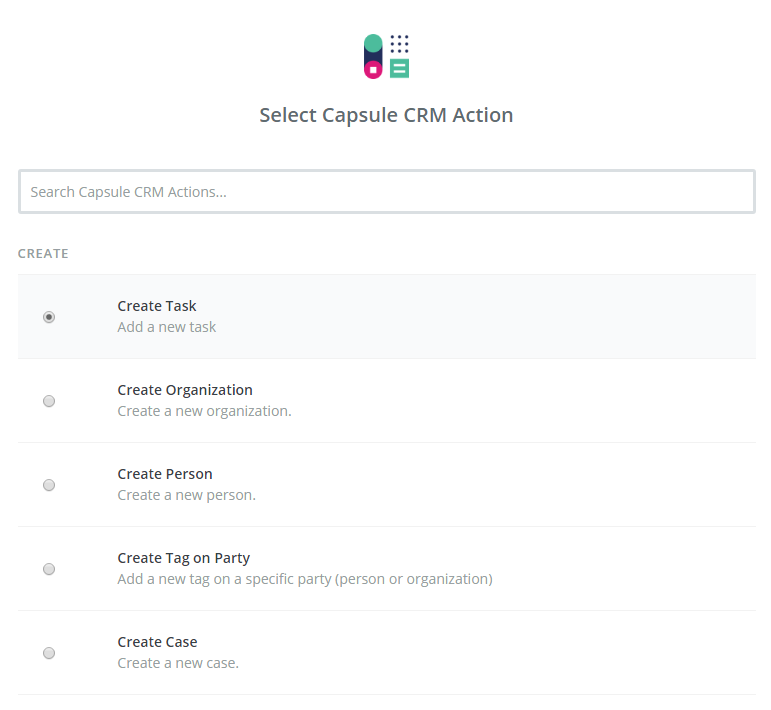
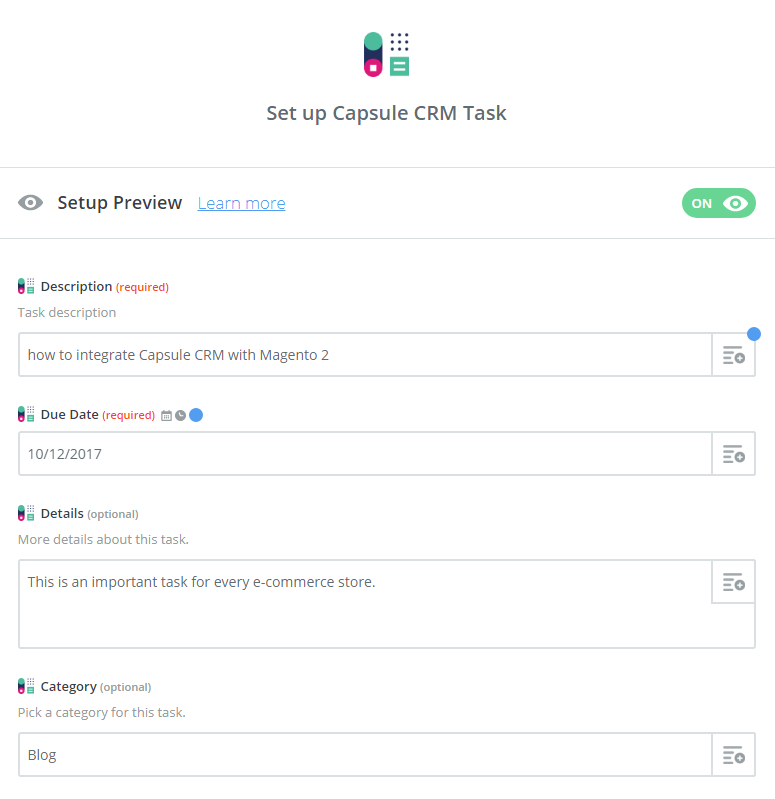
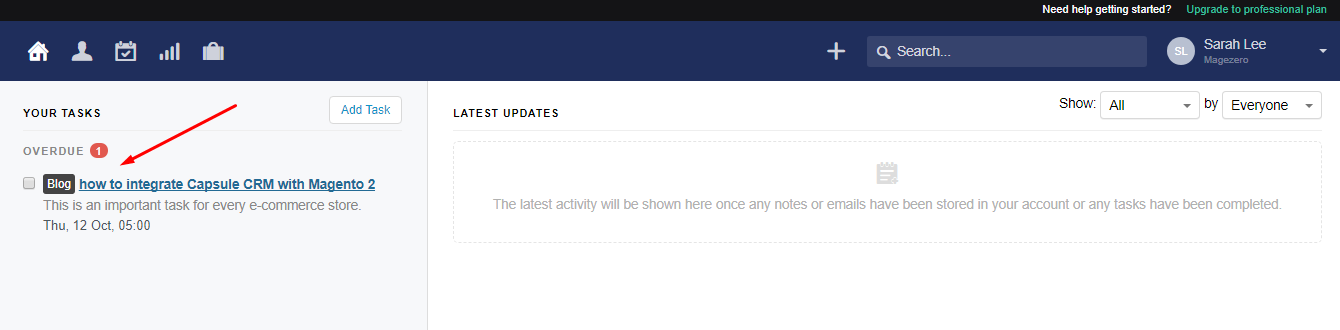
 Have you ever thought to connect your Magento 2 with Capsule CRM but don’t know how to do it? Well, today in this blog we will show you how to integrate Capsule CRM with Magento 2 and what are its benefits?
 Capsule CRM is the most effective software that allows you to keep track of your contracts, your companies, your sales opportunities and other tasks that your need to complete. With Capsule CRM you can manage your projects by creating and monitoring tasks, assigning your colleagues and controlling the time when you finish the task.


 Many store owners face problem when it comes to integration between Vtiger CRM and Magento 2. In this post, we have covered all your queries.