There are number of customer relationship management software on the market; but, we suggest you choose Insightly if your business is really small. It has the best features and you will surely be satisfied with this software.
We will solve your query on how to integrate Insightly with Magento 2. Please bookmark this article so that you can use it whenever you need.
In case,
You don’t know what is Insightly?

In 2009 a powerful customer relationship management came in the market called insightly which offers great features for your Magento store. It is very easy-to-use software that provides an overview of your business. With this you can keep track of your products. It also improves communication with customers, increases productivity for your business. Being cloud-based software you can access your data anytime, anywhere, even from mobile devices.
How to integrate Insightly on Magento 2
To integrate Insightly
- Step 1: Sign up the Zapier account
- Step 2: Sign up the Insightly account
- Step 3: Integrate Magento 2.x
- Step 4: Integrate Insightly
Step 1: Sign up the Zapier account
- Signup Zapier
Step 2: Sign up the Insightly account
- Signup Insightly
- After logging into Zapier, choose Make a Zap to start integrating

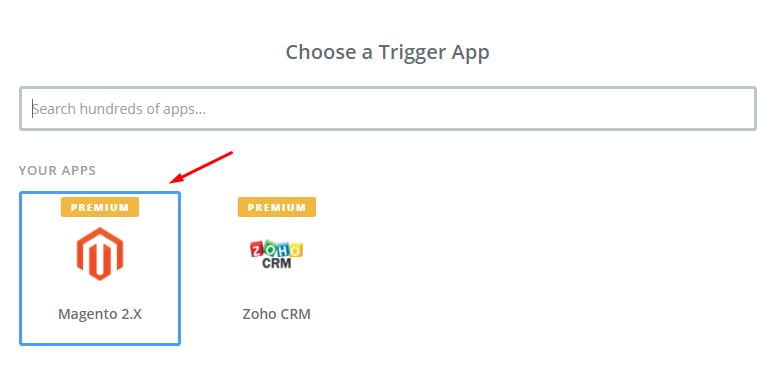
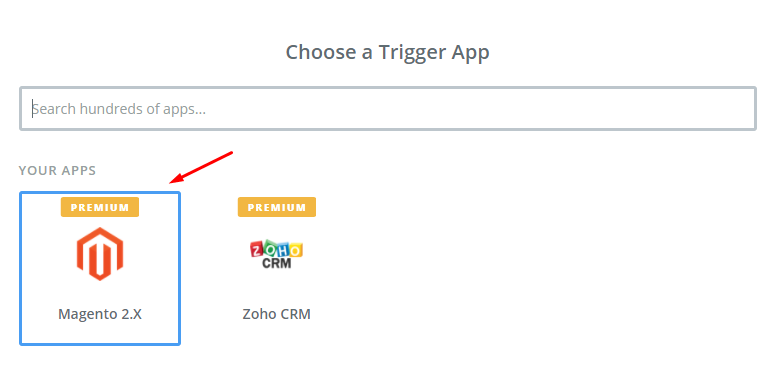
Step 3: Integrate Magento 2.x
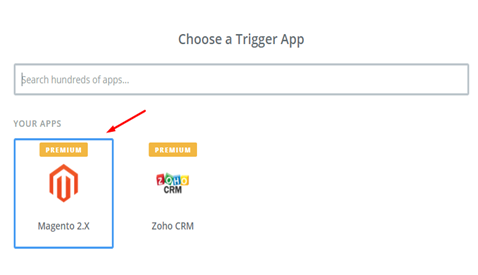
- In this step, choose Magento 2.x so that Zapier can get all data from your store.
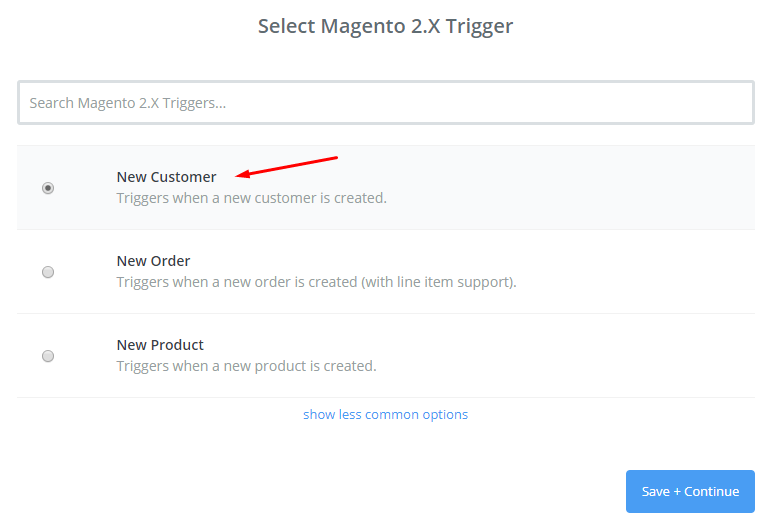
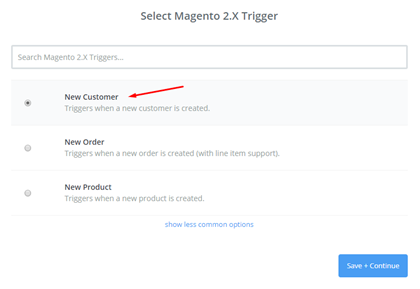
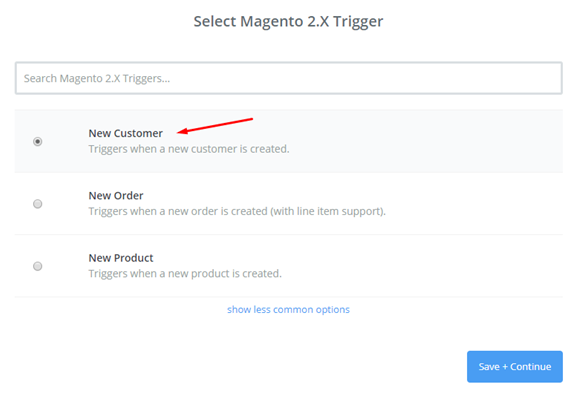
- Then, choose New Customer in select Magento 2.x Trigger field and then click on save+continue.
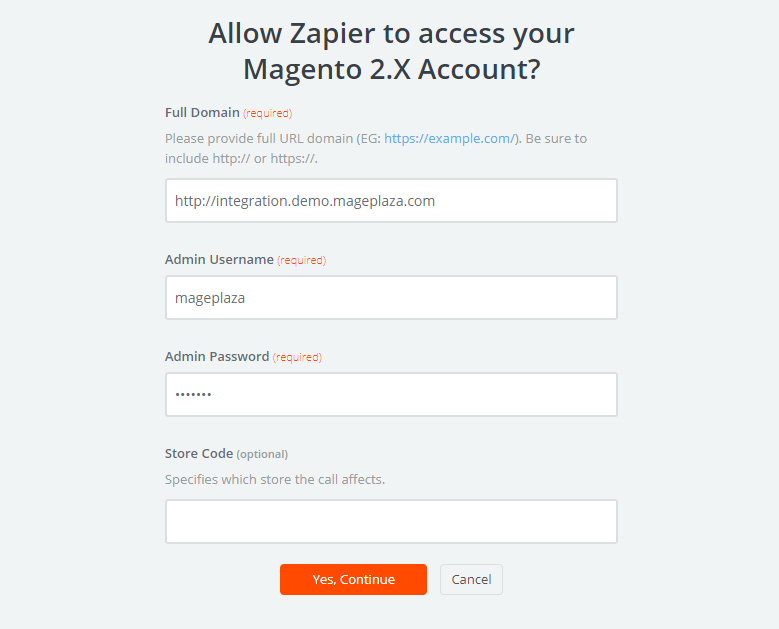
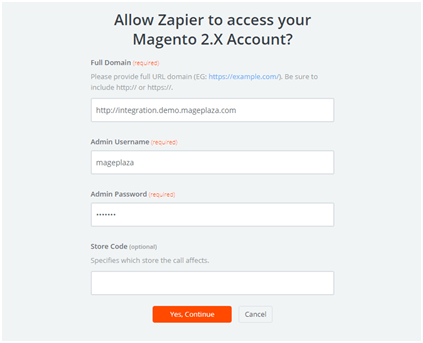
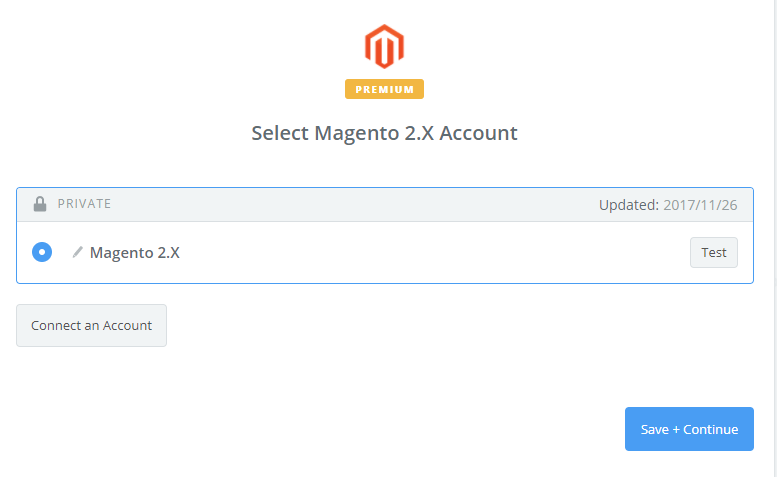
- After that, you need to connect an Account in select Magento 2.x account field. For this you have to enter full domain, admin username and admin password of your Magento 2 store as the following image:
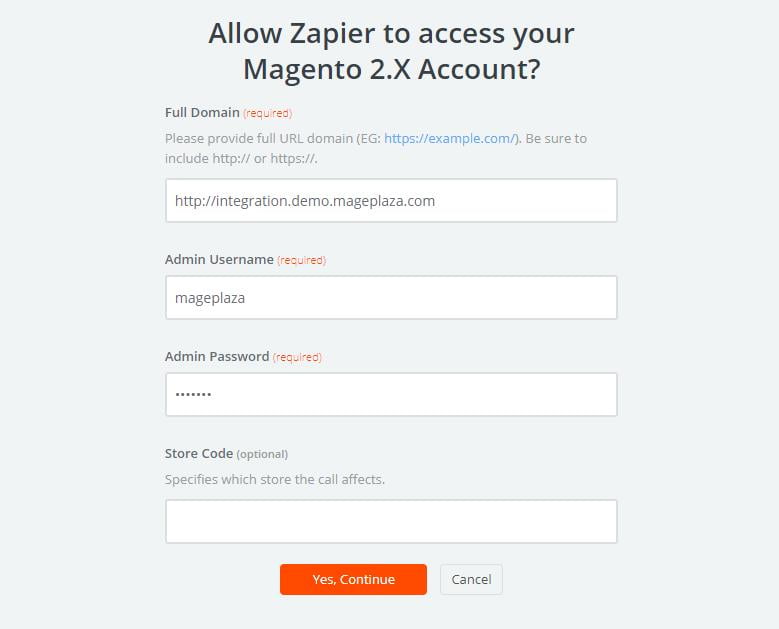
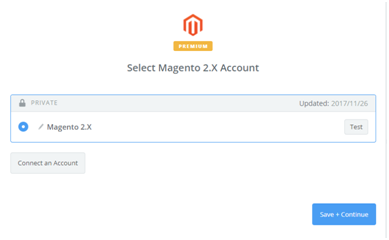
- After creating your Magento 2.x account, your screen will display as an image below. Then, choose Save + Continue.
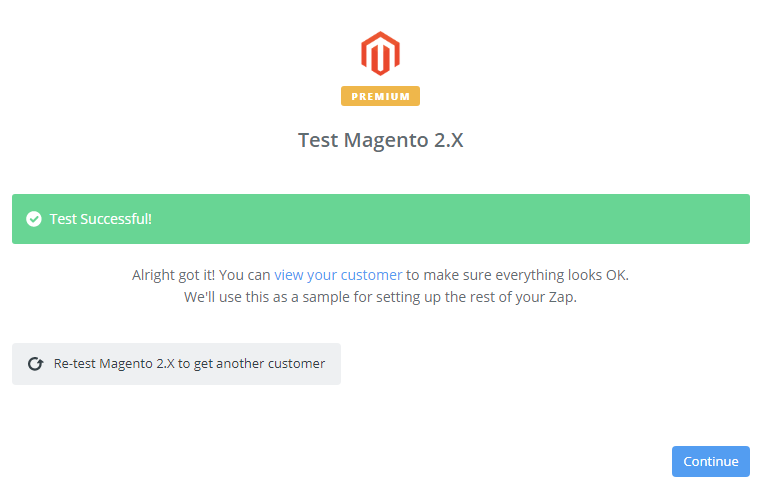
- Wonderful! Your Magento 2.x is tested successfully. Please continue for the next step.


Step 4: Integrate Insightly
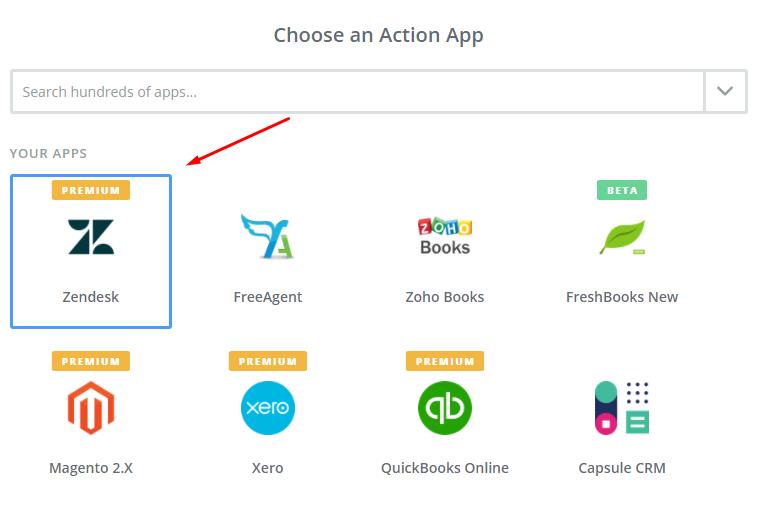
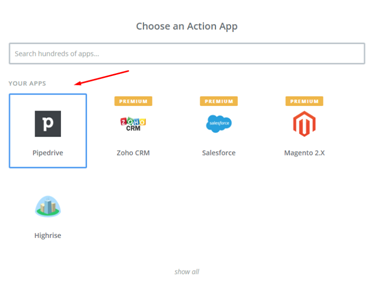
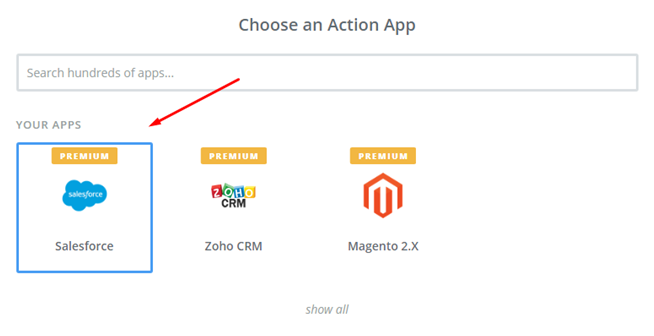
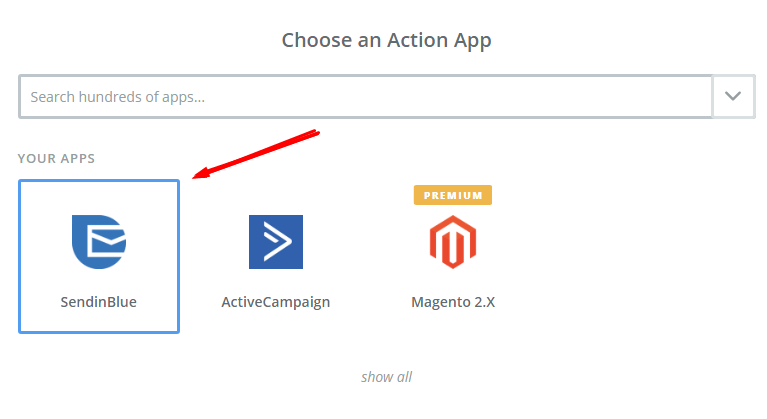
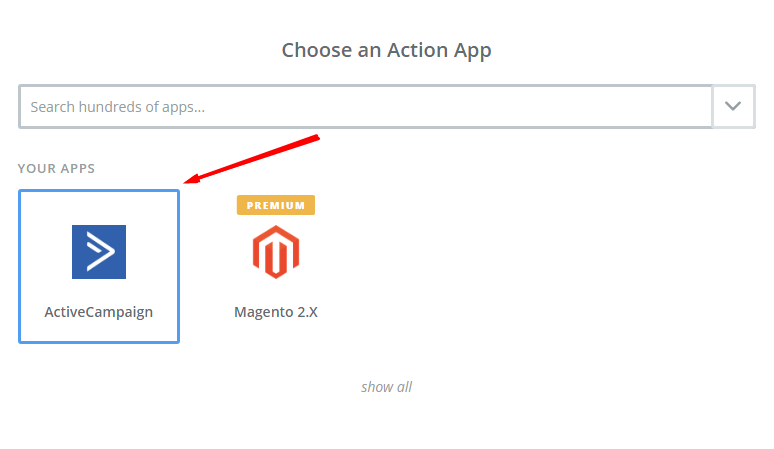
- In Choose an Action App field, choose Insightly and then click on Continue.
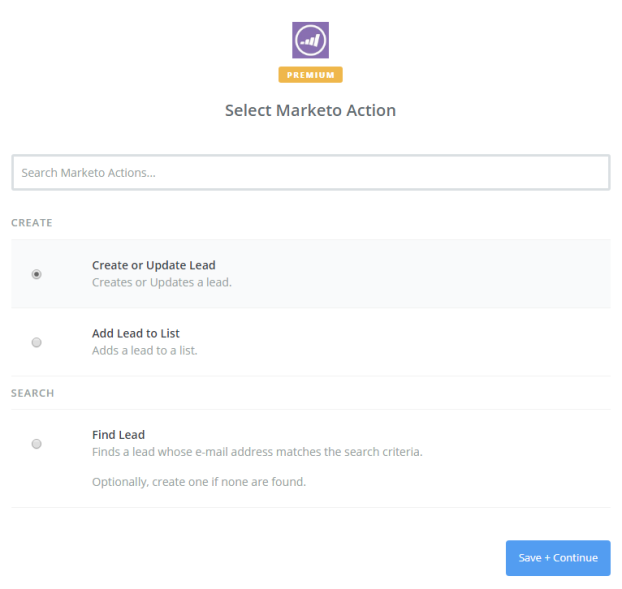
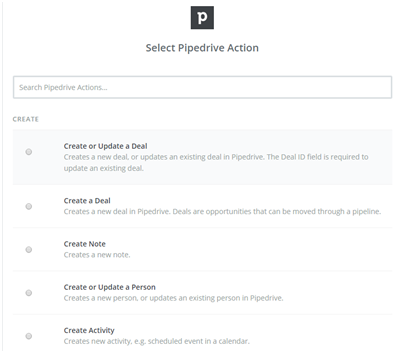
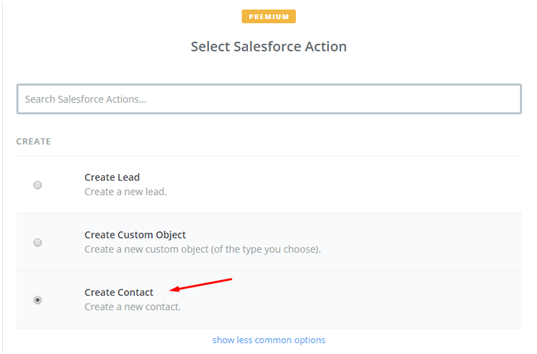
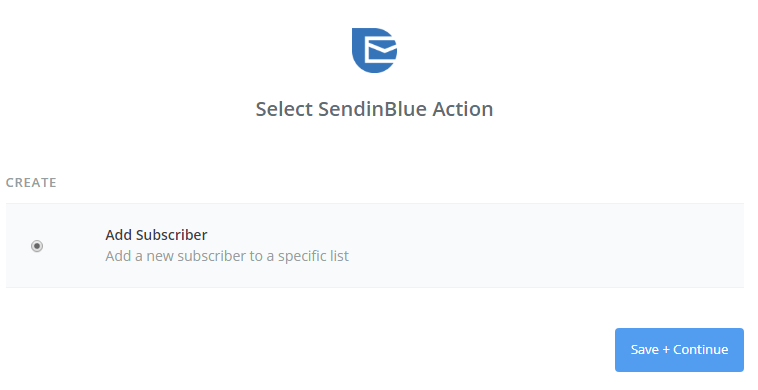
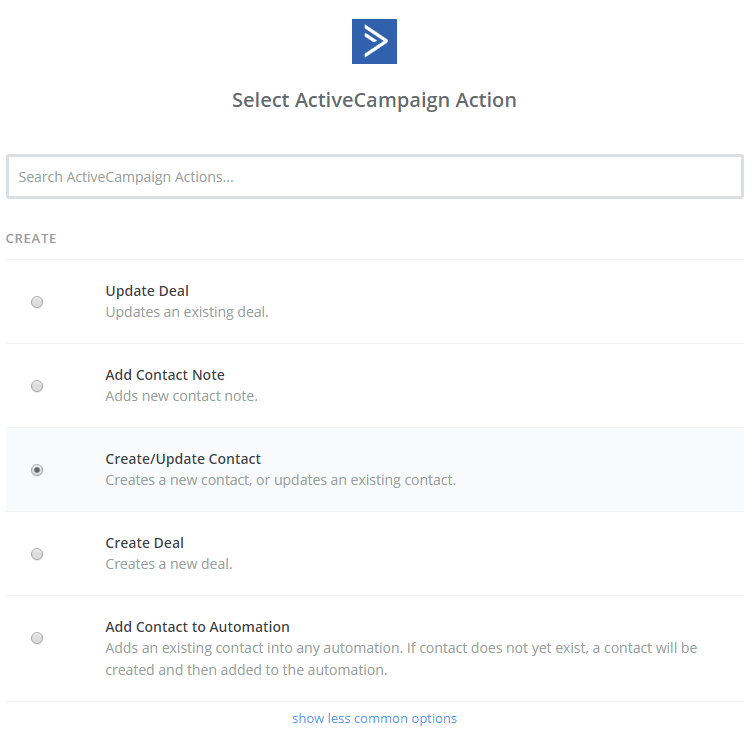
- In Select Insightly Action field, you have to choose one of the options on this page and click on Continue.
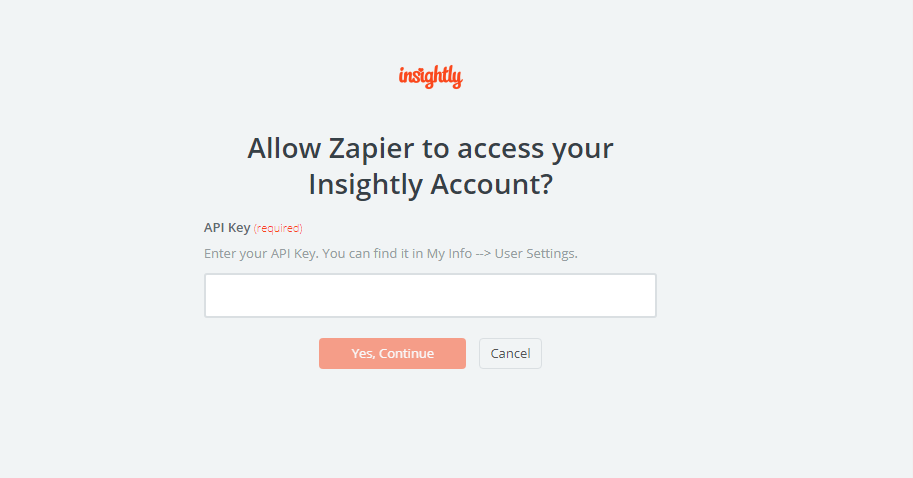
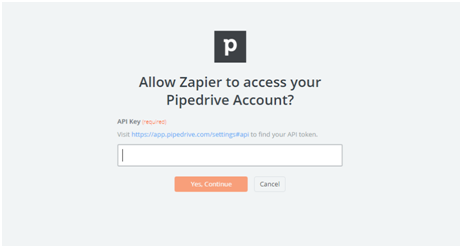
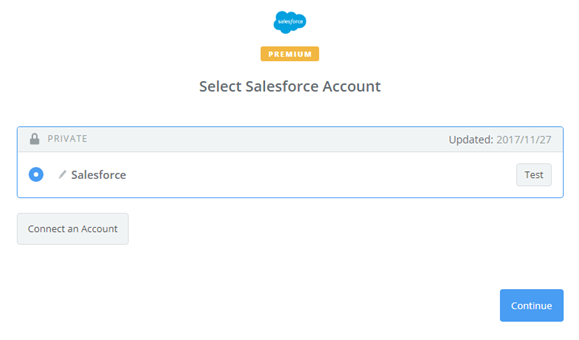
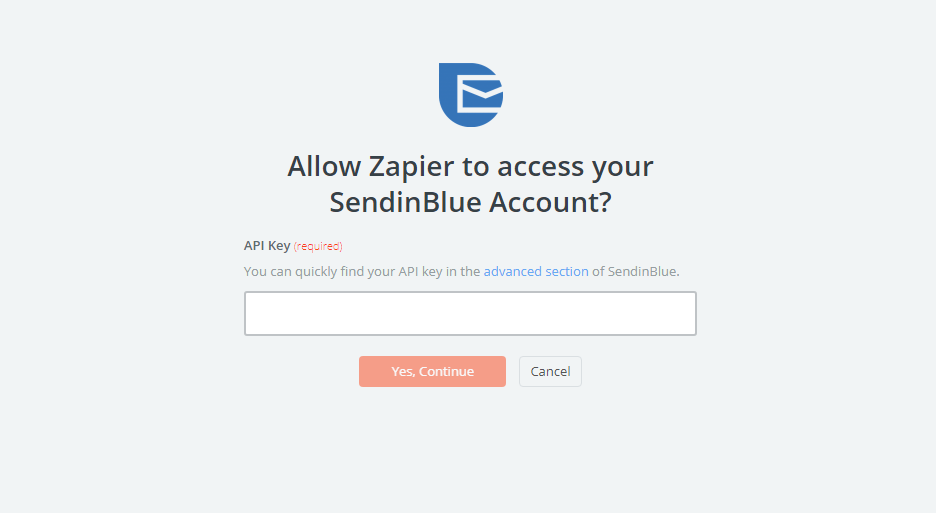
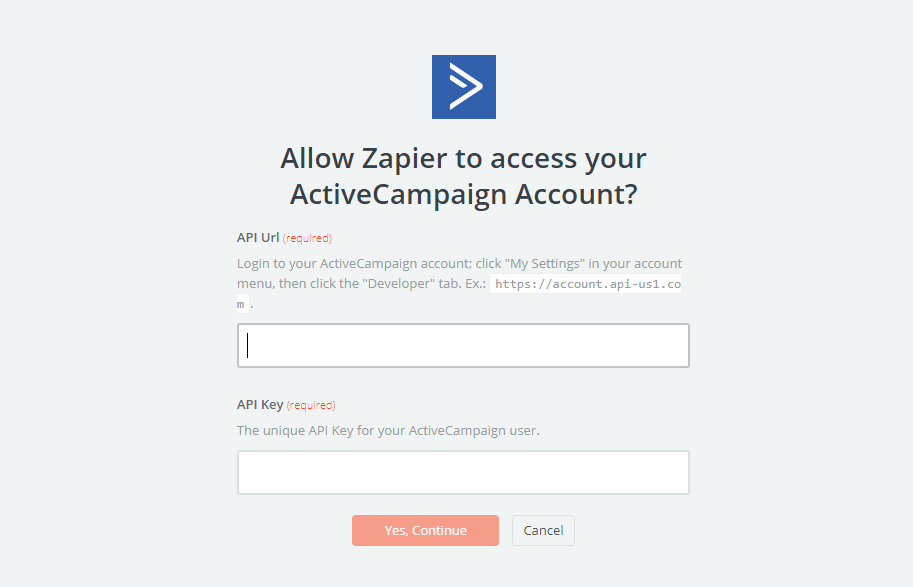
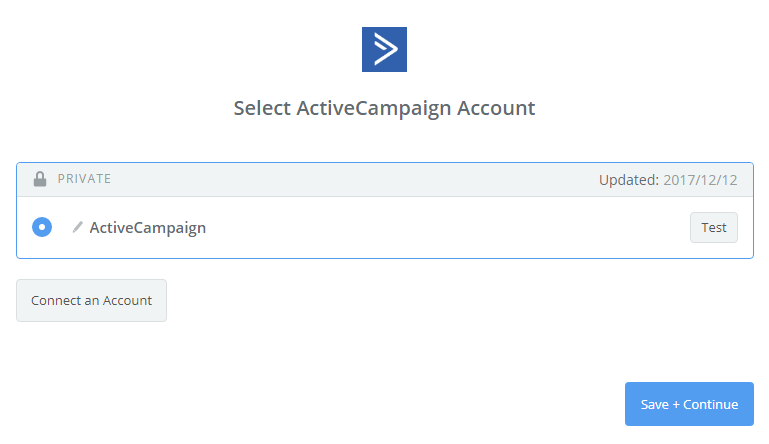
- Next, you need to select Insightly account. So, click on Connect an Account.Your screen will display as an image below, then, enter your API key from your account and click on Yes, Continue.
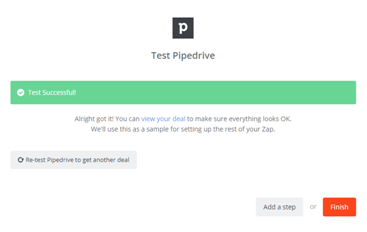
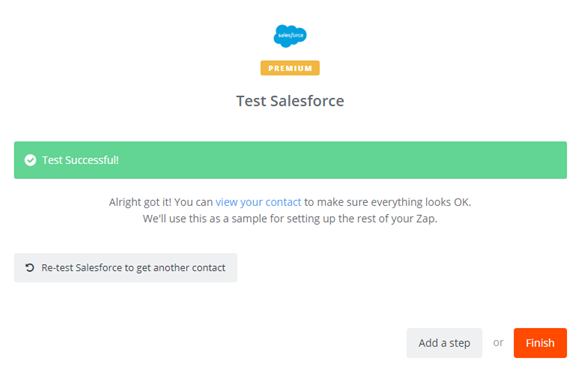
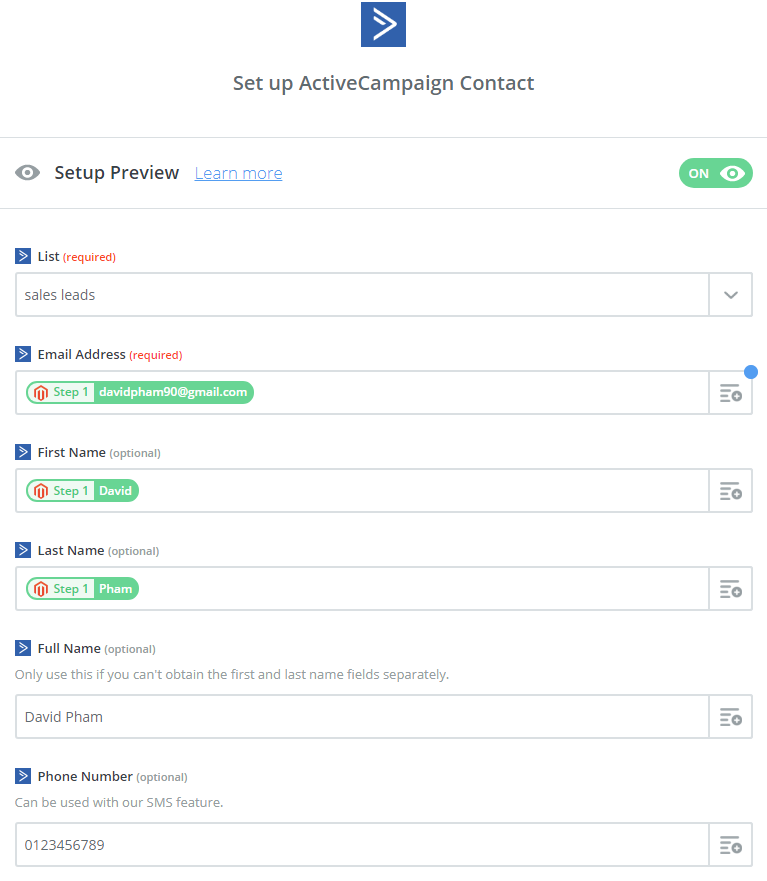
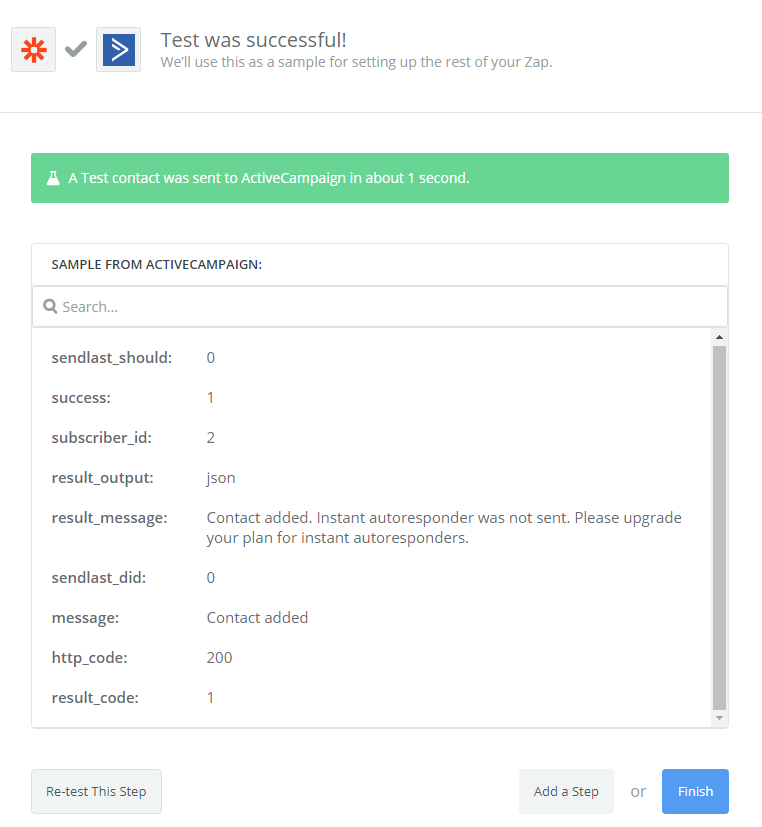
- Next, you have to set up Insightly Contact for that enter all required fields on page, then choose continue box.Great, you have tested Insightly sucessfully. Finally, choose Finish and set the name your zap to complete.
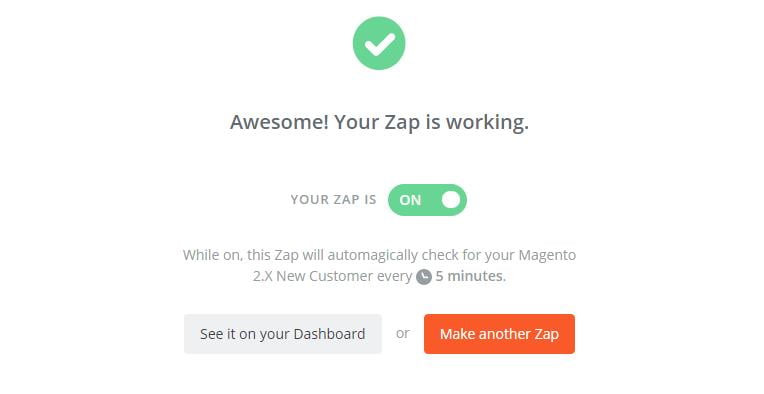
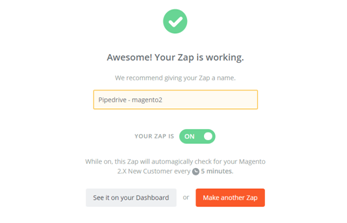
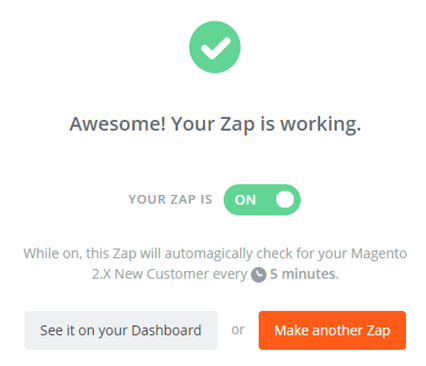
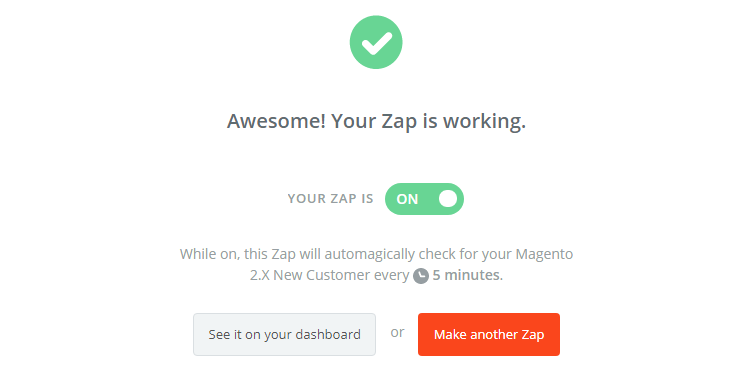
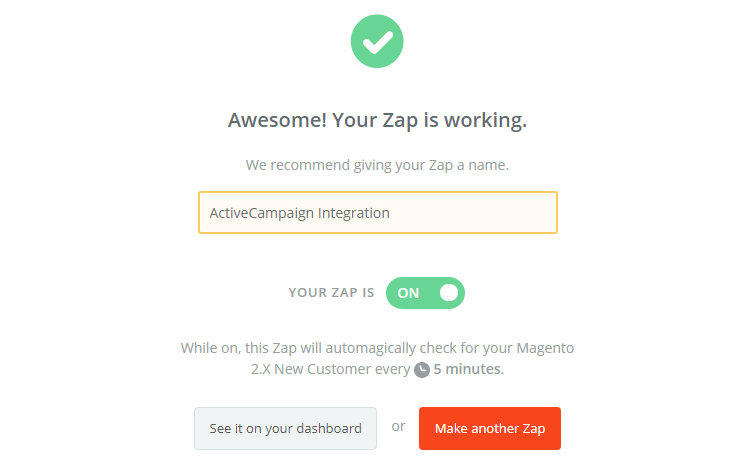
- Your Zap is working thus it will auto-check for your Magento 2.x for new customer.
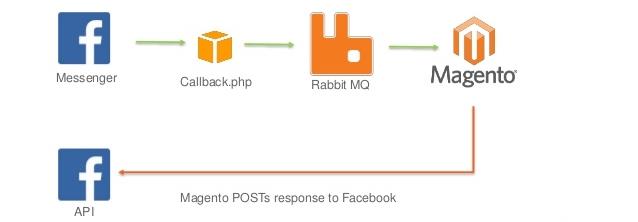
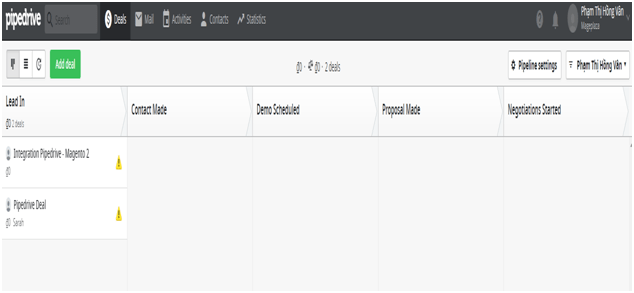
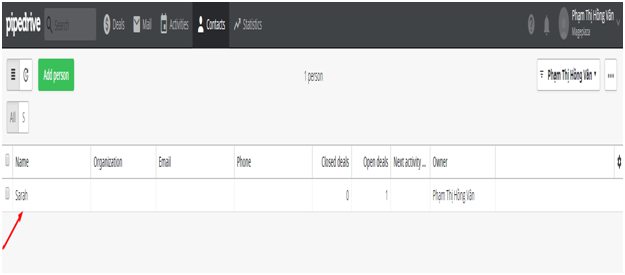
- Below is the result of the integration.
 This is how the integration is done between Insightly and Magento 2. You really need to try this amazing software to make your business run more efficiently. If you still failed to integrate, then hire Mage Monkeys for the Magento integration service.


 We all need easy to use software to handle our finance and what’s better than FreeAgent. So, in this blog we will explore how to integrate FreeAgent with Magento 2. Our steps will make your integration easier.


 In this step, sign in your account and click on Approve App! box. Immediately, your PC will show the following page for you to approve access.
 Now, this is the account that you have just created. Please click on Save + Continue.