We sacrifice by not doing any other technology, so that you get the best of Magento.

We sacrifice by not doing any other technology, so that you get the best of Magento.

    Upload fails. WYSIWYG displays “File validation failed” while uploading Images Magento 2

    Are you getting an error that says “File validation failed” while uploading images from cms block in Magento 2.3 version?

    Check error screenshot :

    I experienced the same issue. But, the problem solved for me after installing the “PHP Fileinfo module“.

    I advise you to install shown PHP extension as per your PHP version :

    Hope that helps!

    How to add custom button on admin order view page in Magento2?

    To add a custom button on the admin order view page, you need to create a before plugin for the PushButtons() method from the MagentoBackendBlockWidgetButtonToolbar class.

    Create di.xml file under the adminhtml scope,
    Path: app/code/Magemonkeys/OrderViewButton/etc/adminhtml/di.xml

    <?xml version="1.0"?>
    <config xmlns:xsi="http://www.w3.org/2001/XMLSchema-instance"
            xsi:noNamespaceSchemaLocation="urn:magento:framework:ObjectManager/etc/config.xsd">
        <!-- Add new Button on sales order view toolbar -->
        <type name="MagentoBackendBlockWidgetButtonToolbar">
            <plugin name="add_sales_button_toolbar" type="MagemonkeysOrderViewButtonPluginBlockWidgetButtonToolbarPlugin" />
        </type>
    </config>

    create ToolbarPlugin.php
    Path: app/code/Magemonkeys/OrderViewButton/Plugin/Block/Widget/Button/ToolbarPlugin.php

    <?php declare(strict_types=1);
    
    namespace MagemonkeysOrderViewButtonPluginBlockWidgetButton;
    
    use MagentoSalesBlockAdminhtmlOrderCreate;
    use MagentoFrameworkViewElementAbstractBlock;
    use MagentoBackendBlockWidgetButtonButtonList;
    use MagentoBackendBlockWidgetButtonToolbar as ToolbarContext;
    
    class ToolbarPlugin
    {
        /**
         * @param ToolbarContext $toolbar
         * @param AbstractBlock $context
         * @param ButtonList $buttonList
         * @return array
         */
        public function beforePushButtons(
            ToolbarContext $toolbar,
            AbstractBlock $context,
            ButtonList $buttonList
        ): array {
            $order = false;
            $nameInLayout = $context->getNameInLayout();
            if ('sales_order_edit' == $nameInLayout) {
                $order = $context->getOrder();
            }
    
            if ($order) {
            	$url = "YOUR_URL"; // add your full url
    	        $buttonList->add(
    	            'my_button',
    	            [
    	                'label' => __('My Button'),
    	            	'on_click' => sprintf("location.href = '%s';", $url),
    	                'class' => 'primary',
    	                'id' => 'my_button'
    	            ]
    	        );
            }
    
            return [$context, $buttonList];        
        }
    }<code>

    Output :

    32% sales hike – That’s what our client achieved with our page speed improvement service

    It was another day when we received an inquiry at MageMonkeys.com which read.

    I’ve an eCommerce store in Magento which is pretty slow. Can you help to make it faster?

    Our Magento expert reached the customer and heard his problem. We realized that their sales were down for last three month. Thus, we checked the technical history of the site & found that three months ago some technical changes were performed which were unaudited.

    We ran an audit on all technical tasks and found that they installed a new theme four months ago and it made their site run slow.

    Our developer discussed the case with an in-house experienced designer and they concluded that the theme was heavy and customization was needed.

    Earlier the speed of their Magento store was

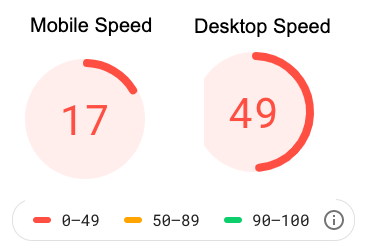
    In today’s era, the number of people who use the internet from Mobile are higher than the number of people who use the internet from desktop/laptop. Like many other digital sites, our client was also not focused more on mobile. His store’s mobile speed was mere 17 which is very poor.

    We found the problem and executed the solutions below.

    1. Image optimization – The client used images of 1-2 MB in size. Our designer reduced the size of those images WITHOUT IMPACTING ON QUALITY.

    2. CSS-JS Optimization – Our HTML developer performed an audit on CSS-JS files and removed unwanted JS & CSS.

    3. Code optimization – Multiple unnecessary codes were duplicated. We resolved the issues by making a master code.

    4. Unnecessary Extension – The client had numerous unwanted extensions that were extending the site’s load time. We turned all of them off.

    Before proceeding ahead, we thought to give speed test another try and check the result of our half-done work and we found below improvement in speed.

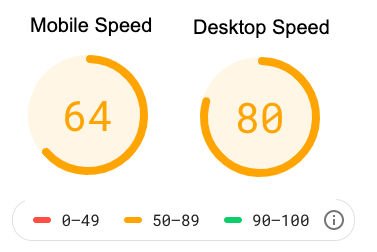
    It wasn’t our BEST, but we were happy as we were making progress.

    5. CDN/AWS Hosting – We advised clients if they could adopt hosting and it also gave us good results.

    6. Other technical changes – We perform many other technical changes such as

    • Reducing redirections,
    • Removing render-blocking
    • Clearing cache
    • Improving server time
    • And other technical activities which we know due to our experience.

    The final result was,
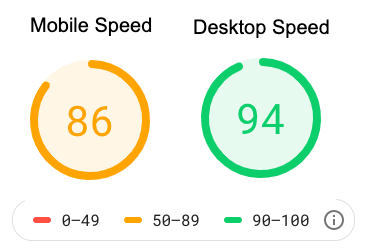
    Amazing. Isn’t it?

    Client get below result after adopting our speed improvement service –

    • The bounce rate reduced.
    • SEO results improved.
    • Social sharing from his blog increased.
    • Last, but not least – 32% HIKES IN SALES.

    The client got good sales & we got a client for a lifetime.

    Let us know if you want to double your sell-by improving your store’s speed.

    How to show associate product’s id of configurable product on product detail page?

    Default Magento does not show associate product’s id of a configurable product on the product detail page When change options of a configurable product.

    If, you want to show associate id then see below code

    Override this file into your theme : vendor/magento/module-catalog/view/frontend/templates/product/view/attribute.phtml

    And, paste below script in last of this page

    <script type="text/javascript">
        
        require(["jquery"], function(jQuery) {
            
            jQuery(".product-options-wrapper select[id^='attribute']").last().on('change', function() {
                
                setTimeout(function (){
                    
                    simpleId=jQuery("input[name=selected_configurable_option]").val();
                    
                    jQuery(".value").html(simpleId);       // Place your place id or class in place of ".value"
    
                }, 500); 
    
            });
    
        }); 
    
    </script>


    Magento 2: Add color background in drop-down

    Let’s say that you have a specific requirement to convert a simple drop-down into drop-down with color in the background.

    Step 1:  Add the “drop-down” class in the mentioned file “app/design/frontend/Magemonkey/luma_child/Magento_ConfigurableProduct/templates/product/view/type/options/configurable.phtml”

    <div class="field configurable required color">
                    <label class="label" for="attribute<?= /* @escapeNotVerified */ $_attribute->getAttributeId() ?>">
                        <span><?= $block->escapeHtml($_attribute->getProductAttribute()->getStoreLabel()) ?></span>
                    </label>
                    <div class="control drop-down">
                        <select name="super_attribute[<?= /* @escapeNotVerified */ $_attribute->getAttributeId() ?>]"
                                data-selector="super_attribute[<?= /* @escapeNotVerified */ $_attribute->getAttributeId() ?>]"
                                data-validate="{required:true}"
                                id="attribute<?= /* @escapeNotVerified */ $_attribute->getAttributeId() ?>"
                                class="super-attribute-select">
                            <option value=""><?= /* @escapeNotVerified */ __('Choose an Option...') ?></option>
                        </select>
                    </div>
                </div>

    Step 2:  Add the below js in the mentioned file
    “app/design/frontend/Magemonkey/luma_child/Magento_ConfigurableProduct/templates/product/view/type/options/configurable.phtml”

    <script type="text/javascript">
    require(["jquery"], function(jQuery) {
        document.onreadystatechange = function(){
            if(document.readyState=='loaded' || document.readyState=='complete') {
                setTimeout(function(){ 
                    jQuery('.drop-down').append('<div class="button"></div>');  
                    jQuery('.drop-down').append('<ul class="select-list"></ul>');
                    jQuery('.drop-down select option').each(function() {
                        var bg = jQuery(this).val();
                        var colortext1 = jQuery(this).text();
                        var colortext1_arr = colortext1.split(' +');
                        
                        var colortext = colortext1_arr[0].replace(/s/g, '');
                        
                        jQuery('.select-list').append('<li class="clsAnchor"><span class="color-icon" style="background-color:' + colortext + '"></span><span value="' + bg + '" class="' + jQuery(this).attr('class') + '" >' + jQuery(this).text() + '</span></li>');
                    });
                    jQuery('.drop-down .button').html('<span class="color-icon" style="background-color:' + jQuery('.drop-down select').find(':selected').val() + '"></span><span class="color-text">' + jQuery('.drop-down select').find(':selected').text() + '</span>' + '<a href="javascript:void(0);" class="select-list-link">Arrow</a>');              
                    jQuery('.drop-down ul li').each(function() {
                        if (jQuery(this).find('span').text() == jQuery('.drop-down select').find(':selected').text()) {
                            jQuery(this).addClass('active');
                        }
                    });
                    jQuery('.drop-down .select-list span').on('click', function() {
                        var dd_text = jQuery(this).text();
                        var dd_img1 = jQuery(this).css('background-color');
                        var dd_img = '#'+dd_img1.match(/d+/g).map(x=>(+x).toString(16).padStart(2,0)).join('');
                        var dd_val = jQuery(this).attr('value');
                        //alert(dd_val);
                        var dd_color_arr = dd_text.split(' +');
                        //var dd_color = dd_color_arr[0];
                        var dd_color = dd_color_arr[0].replace(/s/g, '');
    
                        
                        jQuery('.super-attribute-select option[value='+ dd_val +']').prop('selected',true).trigger('change');
    
                        
                        jQuery('.drop-down .button').html('<span class="color-icon" style="background-color:' + dd_color + '"></span><span class="color-text">' + dd_text + '</span>' + '<a href="javascript:void(0);" class="select-list-link">Arrow</a>');
                        jQuery('.drop-down .select-list span').parent().removeClass('active');
                        jQuery(this).parent().addClass('active');
                        jQuery('.drop-down select[name=options]').val( dd_text );
                        jQuery('.drop-down .select-list li').slideUp();                
                    });
                    
                    jQuery('.drop-down .button').on('click', function() {
                        jQuery('.drop-down ul li').slideToggle();
                    });
    
                }, 3000);
            }
        }
    }); 
    </script>

    This will convert the drop-down in HTML structure and set the color as a background.

    Magento 2: Disable Order Confirmation Email Based On Configuration Settings

    To do this customization we have two options.

    In option one, we can use the event on order success and in the second option we can do it by using the plugin

    Here I am sharing you insights that how can we disable it by using the plugin:

    You have to create di.xml in your existing extension or create an extension which you can do by adding below code,

    app/code/[Vendor Name]/[Module Name]/etc/frontend/di.xml
    <type name="MagentoSalesModelOrderEmailContainerOrderIdentity">
        <plugin name="optDisableEmail" sortOrder="140" type="[Vendor Name][Module Name]PluginOrderEmailOrderEmail"/>
    </type>

    Then you have to create [Vendor Name][Module Name]PluginOrderEmailOrderEmail.php file and add below code,

    public function afterIsEnabled(
        MagentoSalesModelOrderEmailContainerOrderIdentity $subject,
        $result    
    ) {
        if(Get your configuration setting value here){ //Check you require flag value here
           $result = false;
        }
        return $result;
    }

    After that just clean the Magento cache and check by placing a demo order.
    A confirmation email should work based on a configuration setting.

    Create Customer using Programming in Magento 2

    If you want to create customer using programming in Magento 2, then use the following code.

    1. Create savecustomer.php file at magento 2 root folder

    2. Put below code in the savecustomer.php file

    <?php
    use MagentoFrameworkAppBootstrap;
    
    require __DIR__ . '/app/bootstrap.php';
    
    $bootstraps = Bootstrap::create(BP, $_SERVER);
    
    $objectManager = $bootstraps->getObjectManager();
    
    $appState = $objectManager->get('MagentoFrameworkAppState');
    
    $appState->setAreaCode('frontend');
    
    $storeManager = $objectManager->get('MagentoStoreModelStoreManagerInterface');
    
    $websiteId = $storeManager->getStore()->getWebsiteId();
    
    $resource = $objectManager->get('MagentoFrameworkAppResourceConnection');
    
    $connection = $resource->getConnection();
    
    use MagentoCustomerApiAccountManagementInterface;
    
    use MagentoCustomerModelAccountManagement;
    
    $customer = $objectManager->get('MagentoCustomerModelCustomerFactory')->create();
    
    $customer->setWebsiteId($websiteId);
    
    if ($customer->loadByEmail('stevealbini820@gmail.com')->getId()) {
    	echo '<br>';
    	echo 'Customer with email '.$email.' is already registered.';  
    } else {
    	try {
    		// prepare customer data
    		$customer->setEmail('stevealbini820@gmail.com'); 
    		$customer->setFirstname('firstName');
    		$customer->setLastname('lastName');
    
    		// set null to auto-generate password
    		$customer->setPassword('password');
    
    		
    		$customer->setForceConfirmed(true);
    
    		// save data
    		$customer->save();
    
    		// save customer address
    		// this is optional
    		// you can skip saving customer address while creating the customer
    		$customerAddress = $objectManager->get('MagentoCustomerModelAddressFactory')->create();
    		$customerAddress->setCustomerId($customer->getId())
    			->setFirstname('steve')
    			->setLastname('albini')
    			->setCountryId('US')
    			->setRegionId('12')
    			->setRegion('Florida')
    			->setPostcode('11003')
    			->setCity('Miami')
    			->setTelephone('111-222-4444')
    			->setFax('111-222-4444')
    			->setCompany('MageMonkeys')
    			->setStreet(array(
    				'0' => 'Your Customer Address 1', // compulsory
    				'1' => 'Your Customer Address 2' // optional
    			)) 
    			->setIsDefaultBilling('1')
    			->setIsDefaultShipping('1')
    			->setSaveInAddressBook('1');
    
    
    		try {
    			// save customer address
    			$customerAddress->save();
    		} catch (Exception $e) {
    			echo '<br>Cannot save customer address.';
    		}                
    		
    		// send welcome email to the customer
    		$customer->sendNewAccountEmail();
    
    		try {
            	$accountManagementInterface = $objectManager->get('MagentoCustomerApiAccountManagementInterface')->create();
                $accountManagementInterface->initiatePasswordReset($email,AccountManagement::EMAIL_RESET,$customer->getWebsiteId());
        	} 
            catch (NoSuchEntityException $e) {
    			// Do nothing, we don't want anyone to use this action to determine which email accounts are registered.
    		} catch (Exception $exception) {
    			echo '<br>Cannot send reset link email.';            
    		}
    
    	} catch (Exception $e) {
        	echo '<br>';
            echo $e->getMessage();        
        }
    }
    
    ?>

    Run this file on browser to create customer. Hope this article is useful.

    Magento 2: How to Add new custom fonts in your theme?

    If you want to add new custom fonts in your theme then follow below Instruction.

    Let’s say you need to add your font.woff file in your theme web/fonts folder, then you need to import that font in Magento, so you need to create new file _typography.less in your theme web/css/source/ folder.
    and add your fonts like below

    & when (@media-common = true) {
     .lib-font-face(
     @family-name: "Neue Plak W04 Regular",
     @font-path: '@{baseDir}fonts/65781df7-af4a-4a7e-8a89-83876affcd78',
     @font-weight: normal,
     @font-style: normal
     );
    
     .lib-font-face(
     @family-name: "font-family-name-here",
     @font-path: '@{baseDir}fonts/{your-woff-font-file-name-here}',
     @font-weight: normal,
     @font-style: normal
     );
    
     
    }

    Magento 2: How to remove postcode field in checkout?

    Today we are going to talk about how to remove the postcode field in checkout in Magento 2?

    The field is dynamically created from EAV attributes on the LayoutProcessor class.

    All we need to do is to set is_user_defined to 1 for the postcode eav_attribute. I recommend doing this via a setup resource, like this:

    public function install(ModuleDataSetupInterface $setup, ModuleContextInterface $context)
    {
        /** @var MagentoCustomerSetupCustomerSetupFactory $customerSetup */
        $customerSetup = $this->customerSetupFactory->create(['setup' => $setup]);
    
        $setup->startSetup();
    
        $attribute = $customerSetup->getEavConfig()->getAttribute('customer_address', 'postcode');
        $attribute->setIsUserDefined(1)->save();
    
        $attribute->save();
    }

    also, we need to remove validation for that, so we can direct set 0 to DB in eav_attribute table

    that’s it.


    Magento 2: How to customize existing attribute show in admin grid column via InstallData.php?

    Magento 2 create a custom attribute and save data

    Create a custom module and follow the below step

    Create InstallData.php file in VenderModulenameSetup

    <?php
    
    namespace VenderModulenameSetup;
    
    use MagentoFrameworkModuleSetupMigration;
    use MagentoFrameworkSetupInstallDataInterface;
    use MagentoFrameworkSetupModuleContextInterface;
    use MagentoFrameworkSetupModuleDataSetupInterface;
    
    class InstallData implements InstallDataInterface {
    
        private $customerSetupFactory;
    
        public function __construct(MagentoCustomerSetupCustomerSetupFactory $customerSetupFactory) {
            $this->customerSetupFactory = $customerSetupFactory;
        }
    
        public function install(ModuleDataSetupInterface $setup, ModuleContextInterface $context) {
            $installer = $setup;
            $installer->startSetup();
            $customerSetup = $this->customerSetupFactory->create(['setup' => $setup]);
            $entityTypeId = $customerSetup->getEntityTypeId(MagentoCustomerModelCustomer::ENTITY);
    
            $customerSetup->addAttribute(MagentoCustomerModelCustomer::ENTITY, "custom_attribute", array(
                "type" => "int",
                "backend" => "",
                "label" => "Custom Attribute",
                "input" => "select",
                "visible" => true,
                'source' => 'MagentoEavModelEntityAttributeSourceTable',
                "required" => false,
                "default" => "",
                "frontend" => "",
                "unique" => true,
                "note" => "",
            ));
    
            $employee = $customerSetup->getAttribute(MagentoCustomerModelCustomer::ENTITY, "custom_attribute");
    
            $employee = $customerSetup->getEavConfig()->getAttribute(MagentoCustomerModelCustomer::ENTITY, 'custom_attribute');
            $used_in_forms[] = "adminhtml_customer";
            $used_in_forms[] = "checkout_register";
            $used_in_forms[] = "customer_account_create";
            $used_in_forms[] = "customer_account_edit";
            $used_in_forms[] = "adminhtml_checkout";
            $employee->setData("used_in_forms", $used_in_forms)
                    ->setData("is_used_for_customer_segment", true)
                    ->setData("is_system", 0)
                    ->setData("is_user_defined", 1)
                    ->setData("is_visible", 1)
                    ->setData("is_used_in_grid", 1)
                    ->setData("is_visible_in_grid", 1)
                    ->setData("is_filterable_in_grid", 1)
                    ->setData("is_searchable_in_grid", 1)
                    ->setData("sort_order", 100);
            $employee->save();
    
            $installer->endSetup();
        }
    
    }